Track, Share, and Modify Projects
Check job status
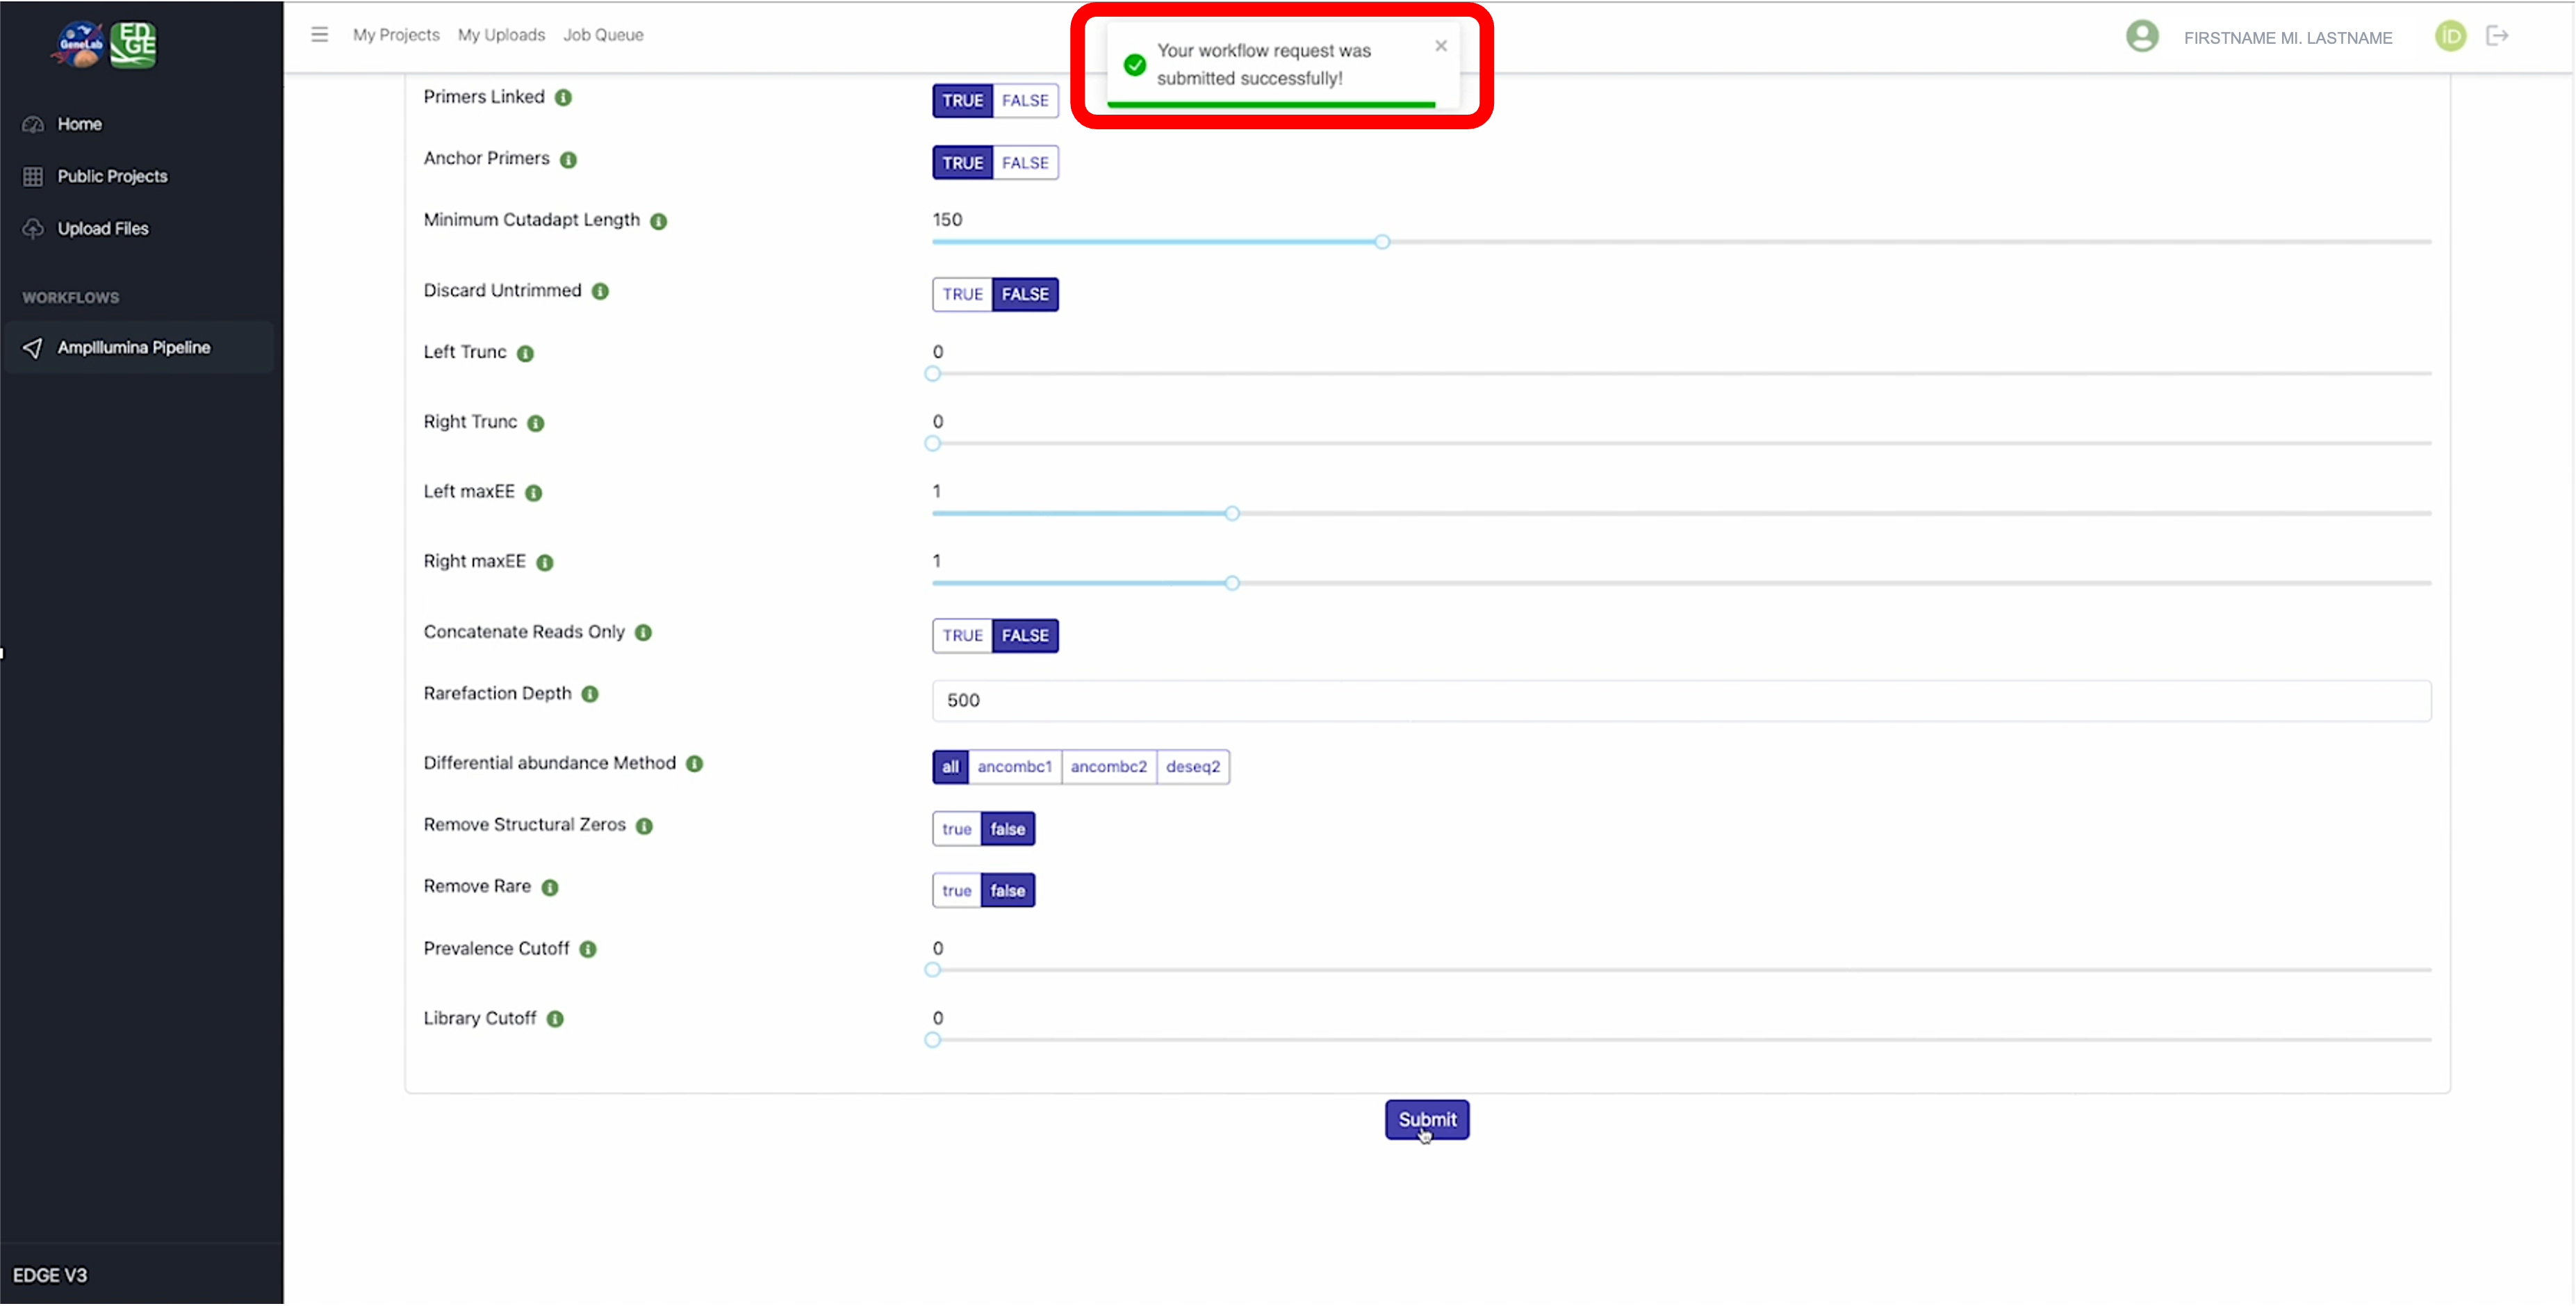
After submitting your job, you should see a notification indicating that your job was successfully submitted, as shown below, and be automatically redirected to “My Projects”.
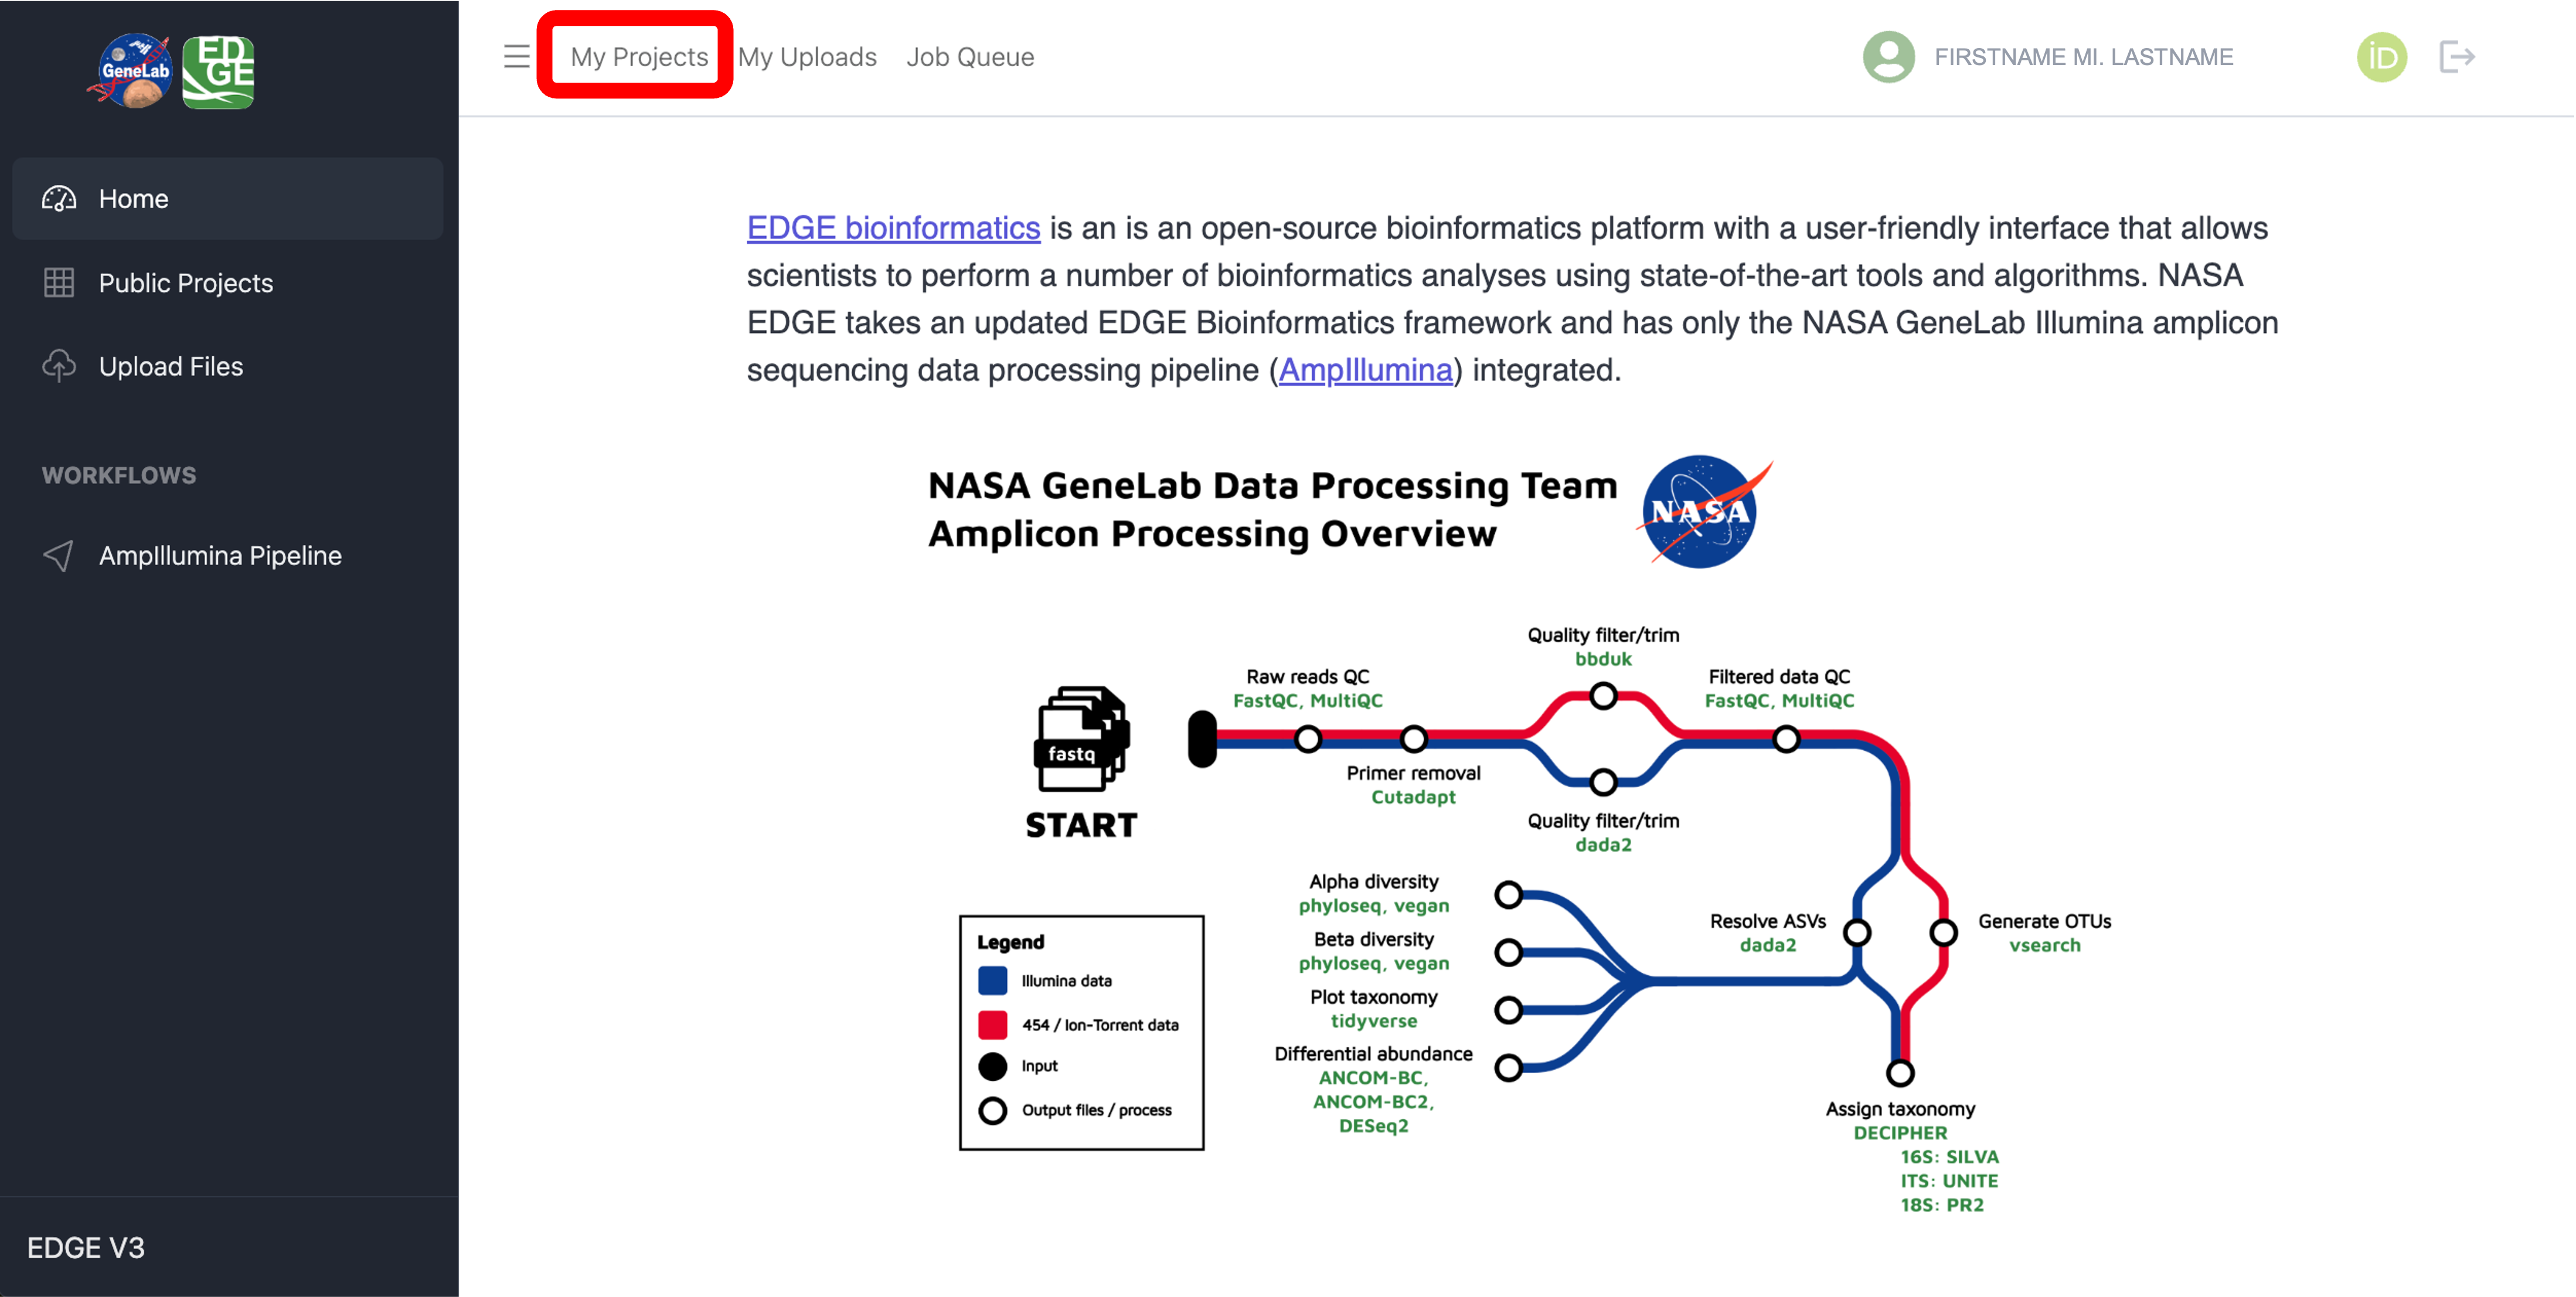
If you are not re-directed to “My Projects”, you can navigate there by clicking on the “My Projects” tab at the top of the NASA EDGE platform as shown below:
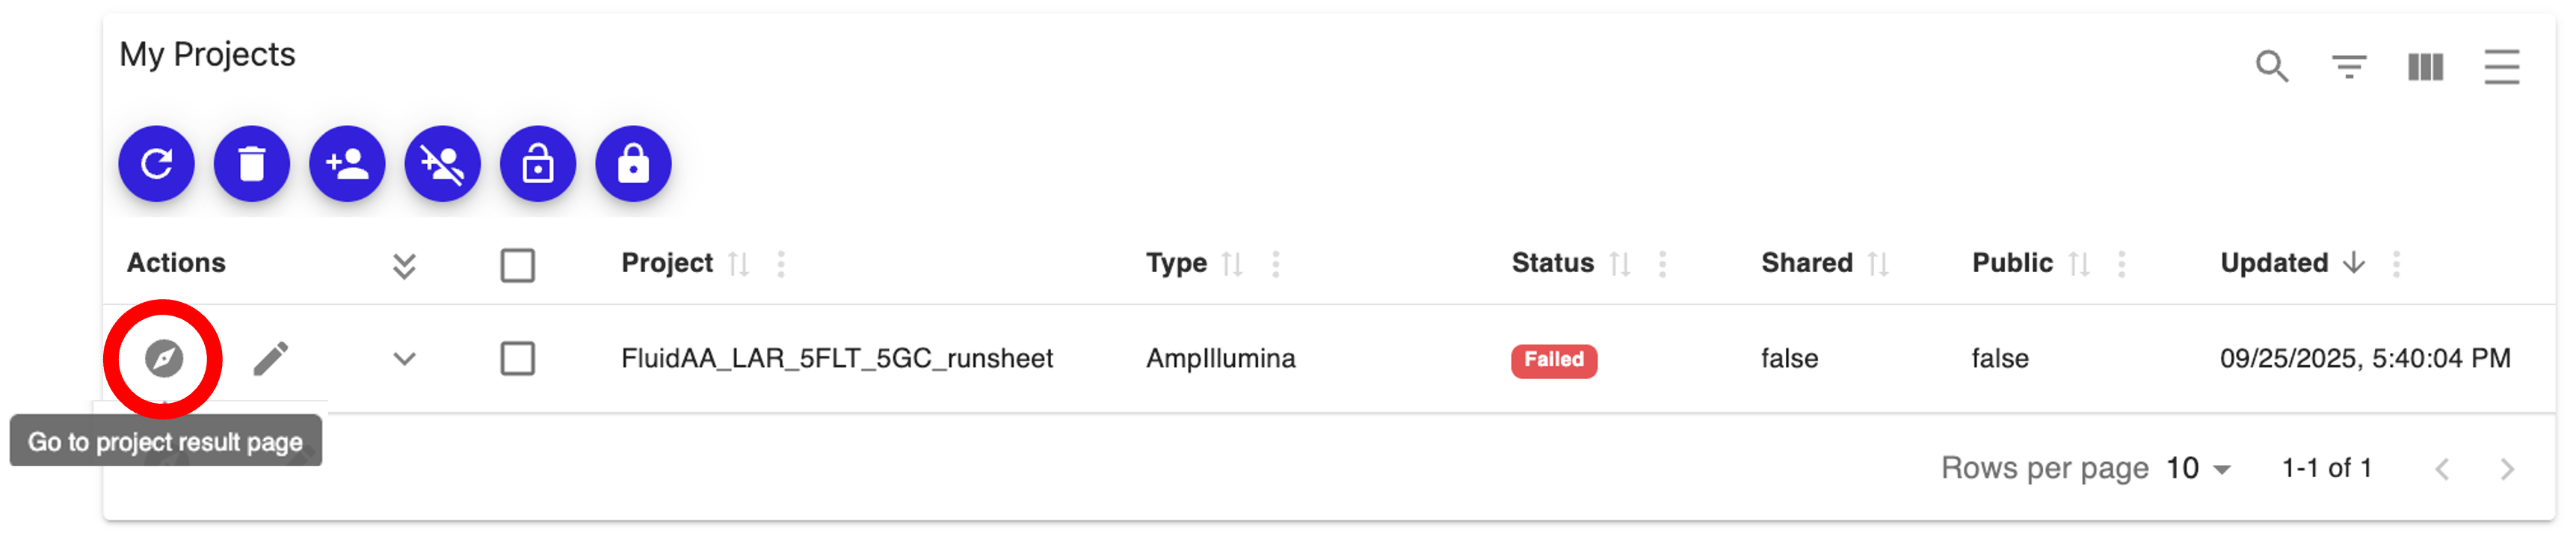
You will see your submitted project listed in the table along with the current status in the “Status” column. Click on the “Refresh table” icon in the top left corner of the table to update the job status. Your job status will transition from “In queue” to “Processing” to “Running” to either “Complete”, if the job completes successfully, or “Failed”, if the job did not complete successfully, as shown below.

Click on the “Go to project result page” icon under the “Actions” column for your job to view the log file (for failed jobs) or to view the workflow results (for jobs that completed successfully), as shown below:
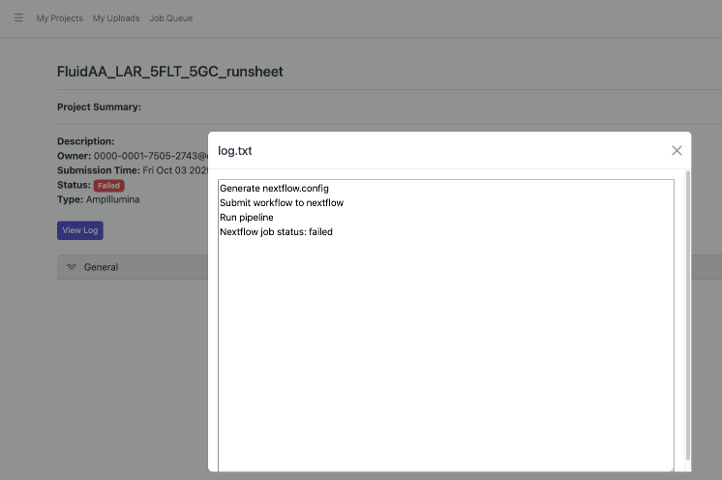
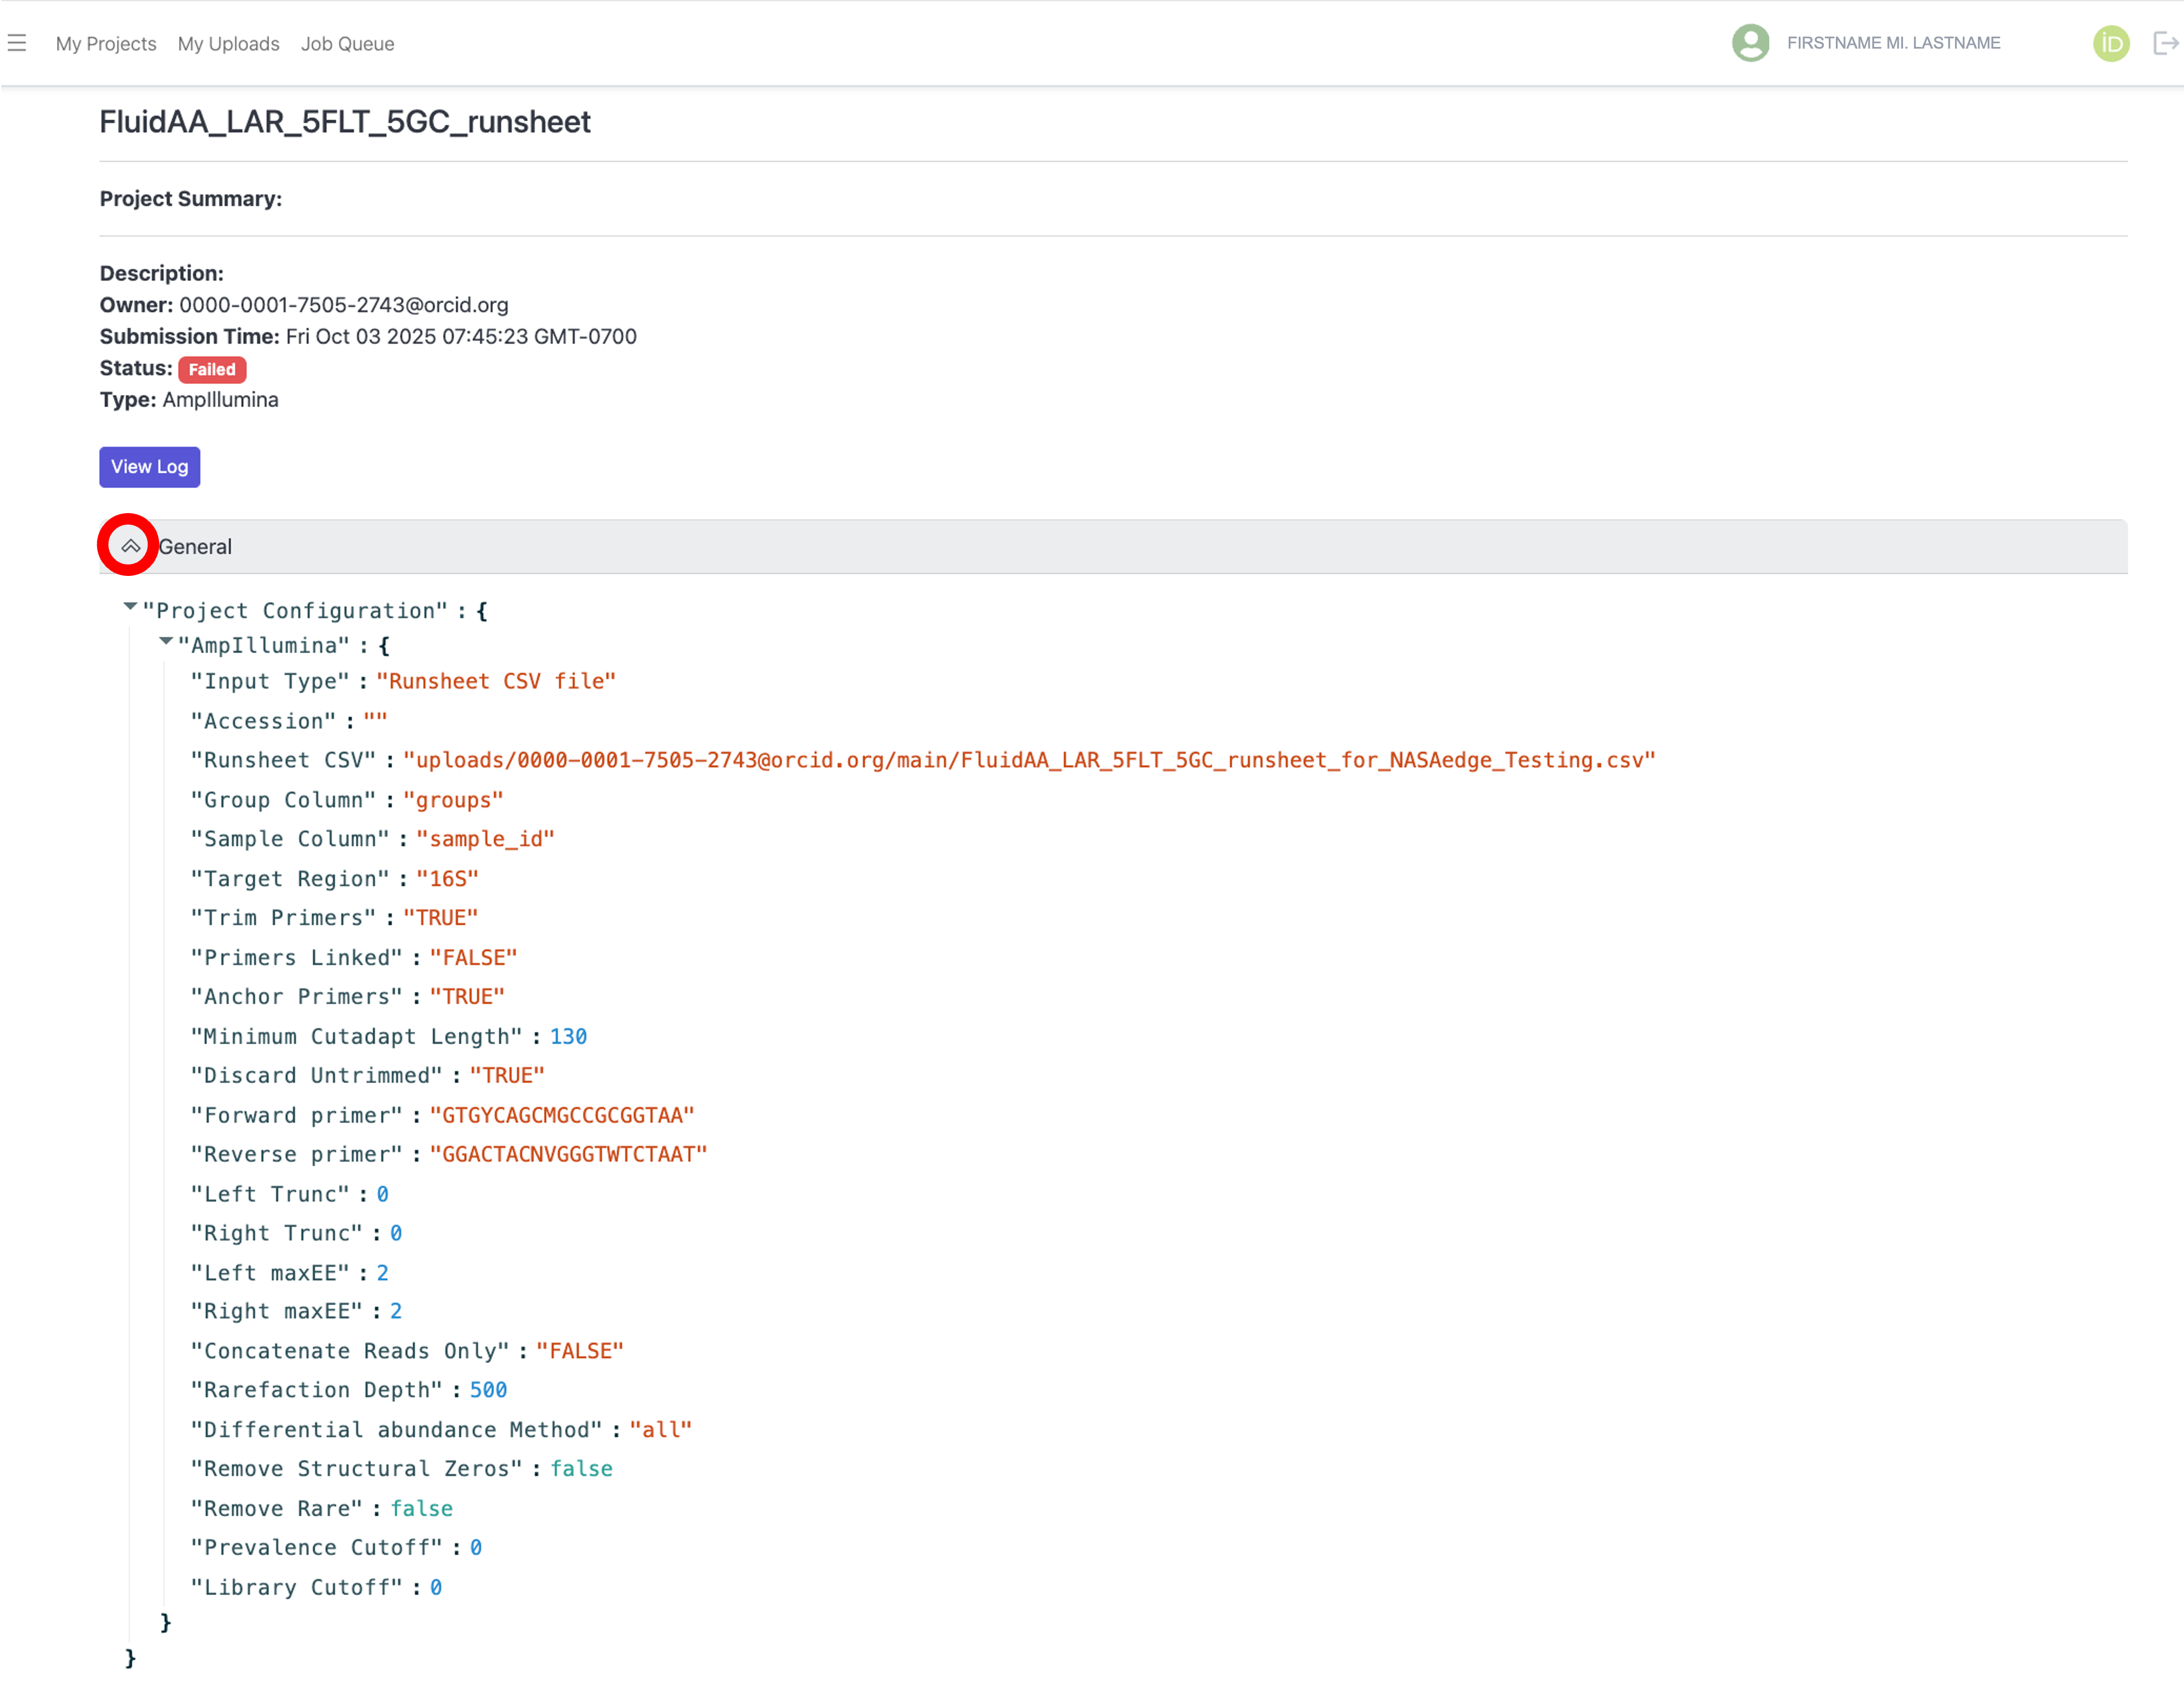
On the project result page for failed jobs, you can click on the “View Log” button to see the error message regarding why your job failed, as shown below:
For both failed and completed jobs, you can view the parameters that were used for the job in the project result page by expanding the “General” tab as shown below:
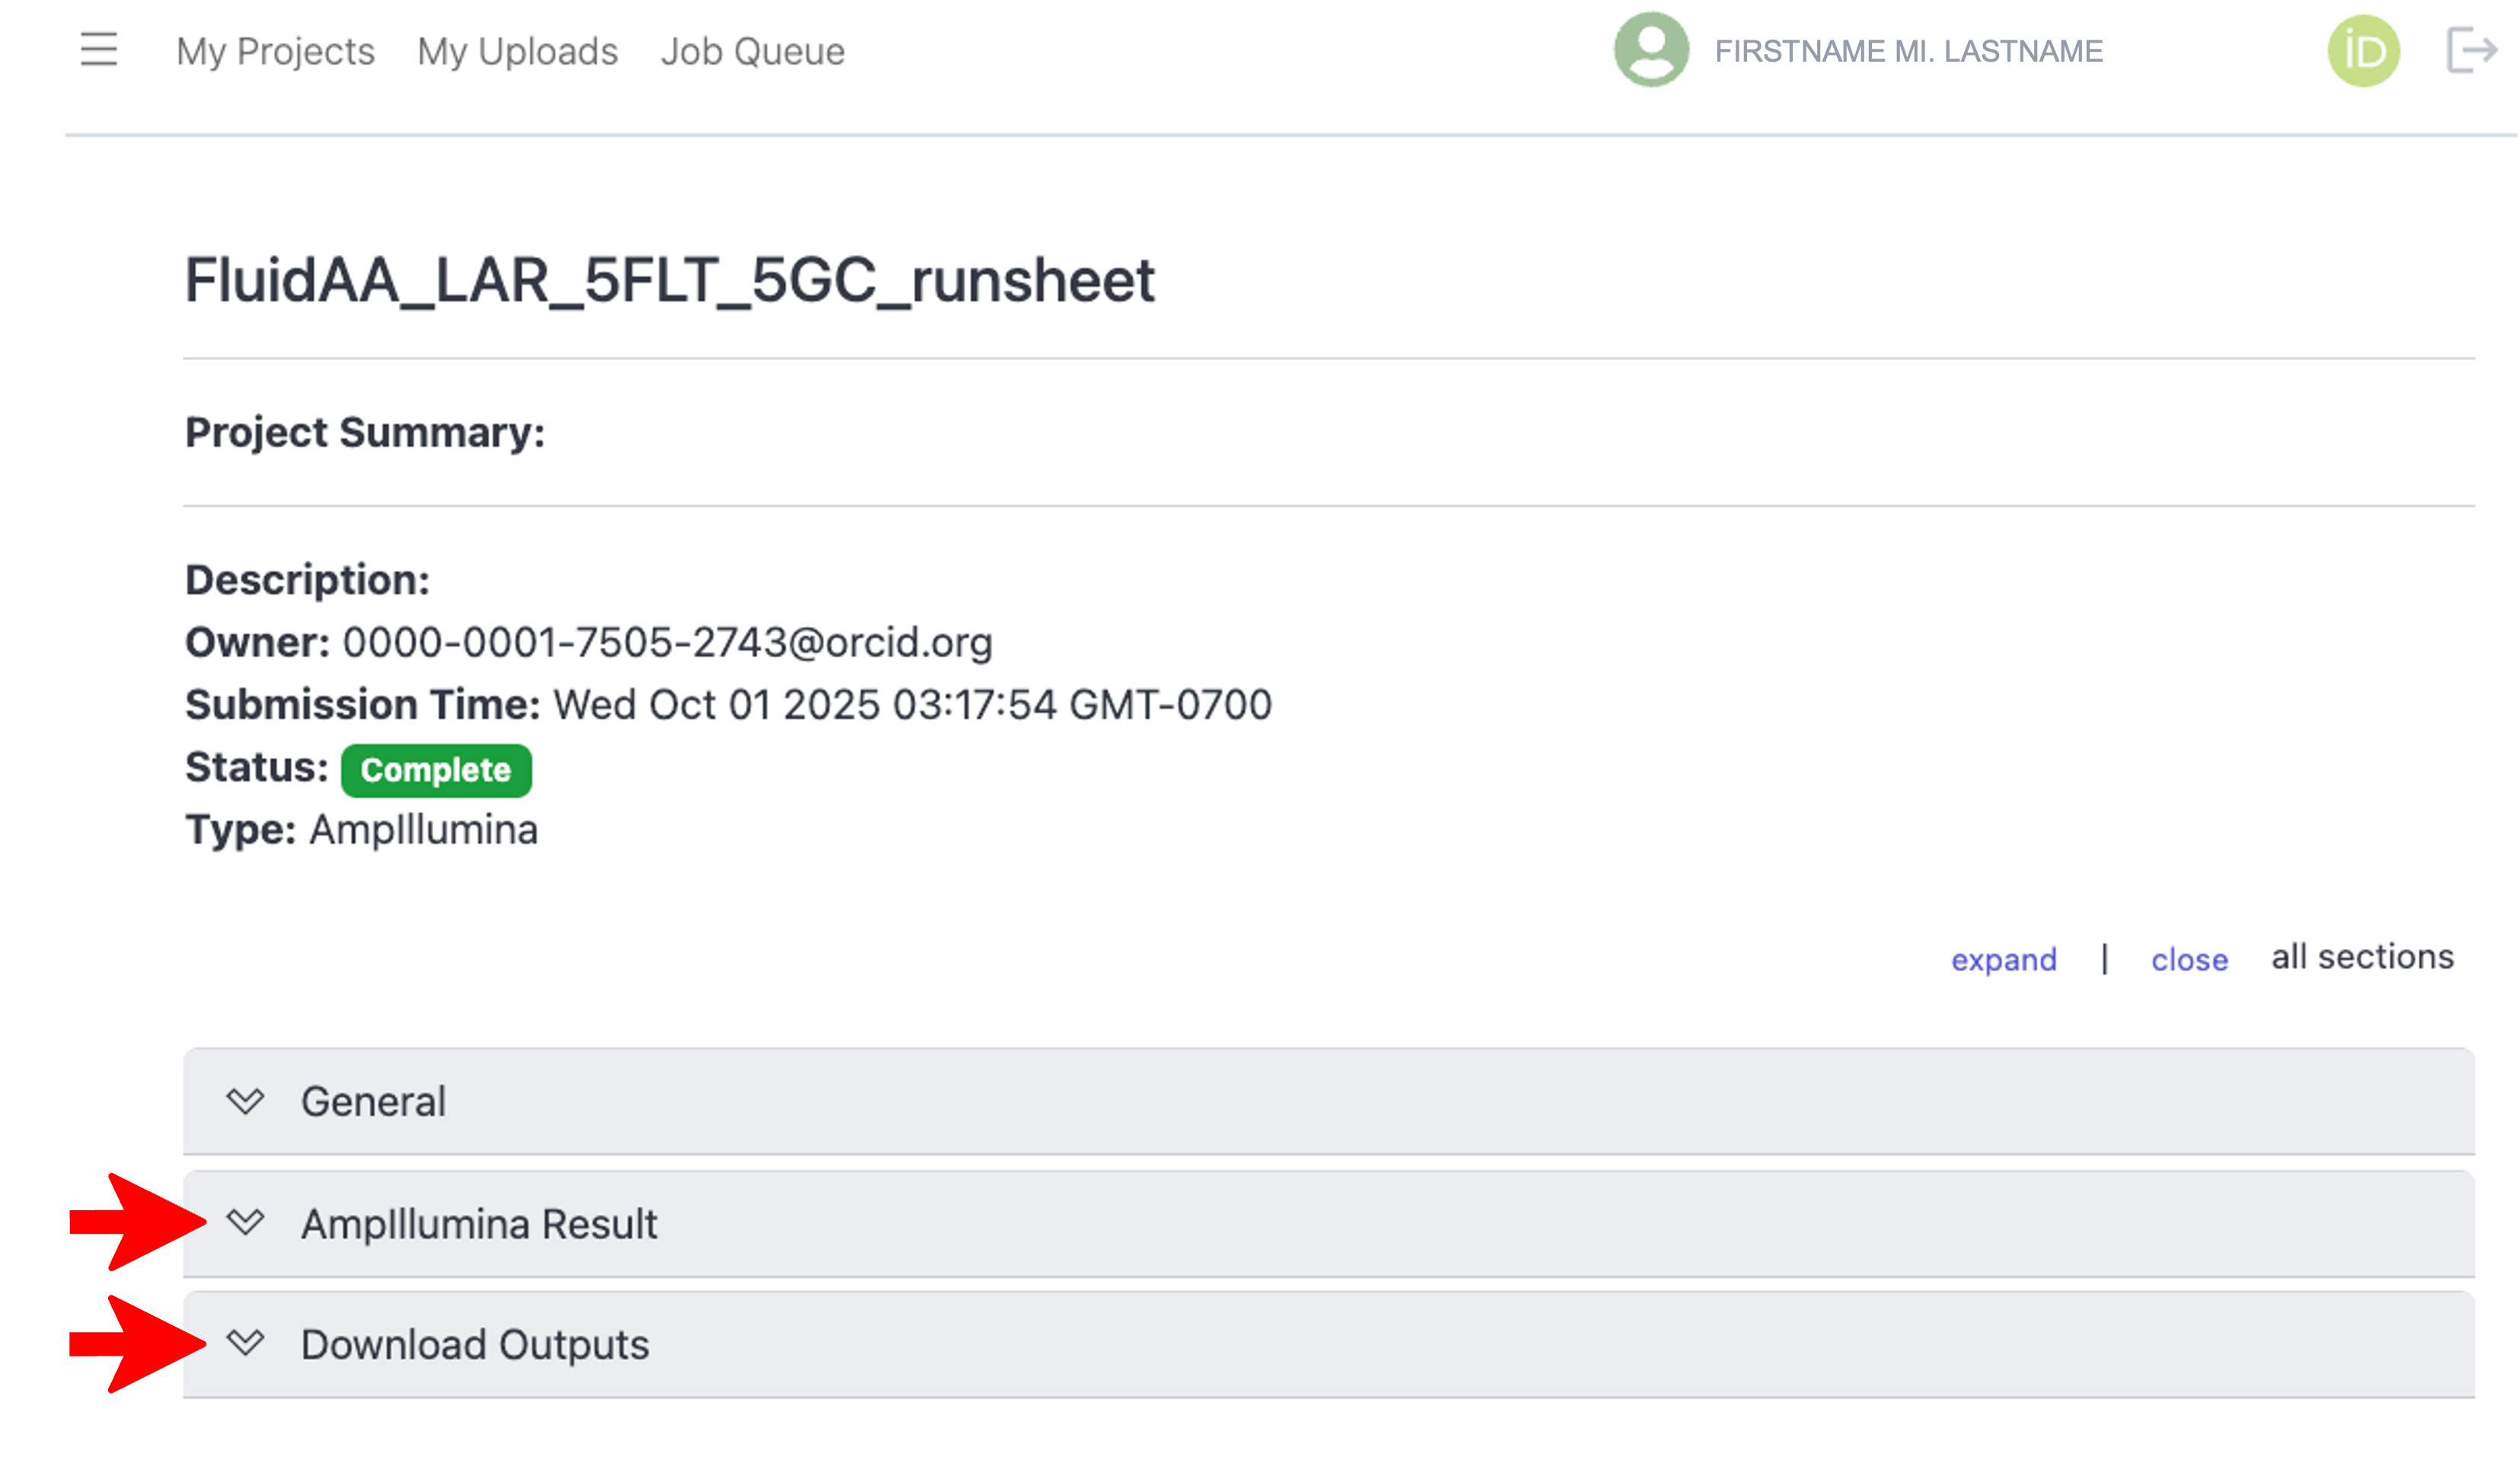
If your job completed successfully, you can view the workflow output files by expanding the “
Result” tab, and you can download the results by expanding the “Download Outputs” tab, as indicated below: Note: For a description of the workflow results, visit the respective workflow tutorial.
Share jobs/projects
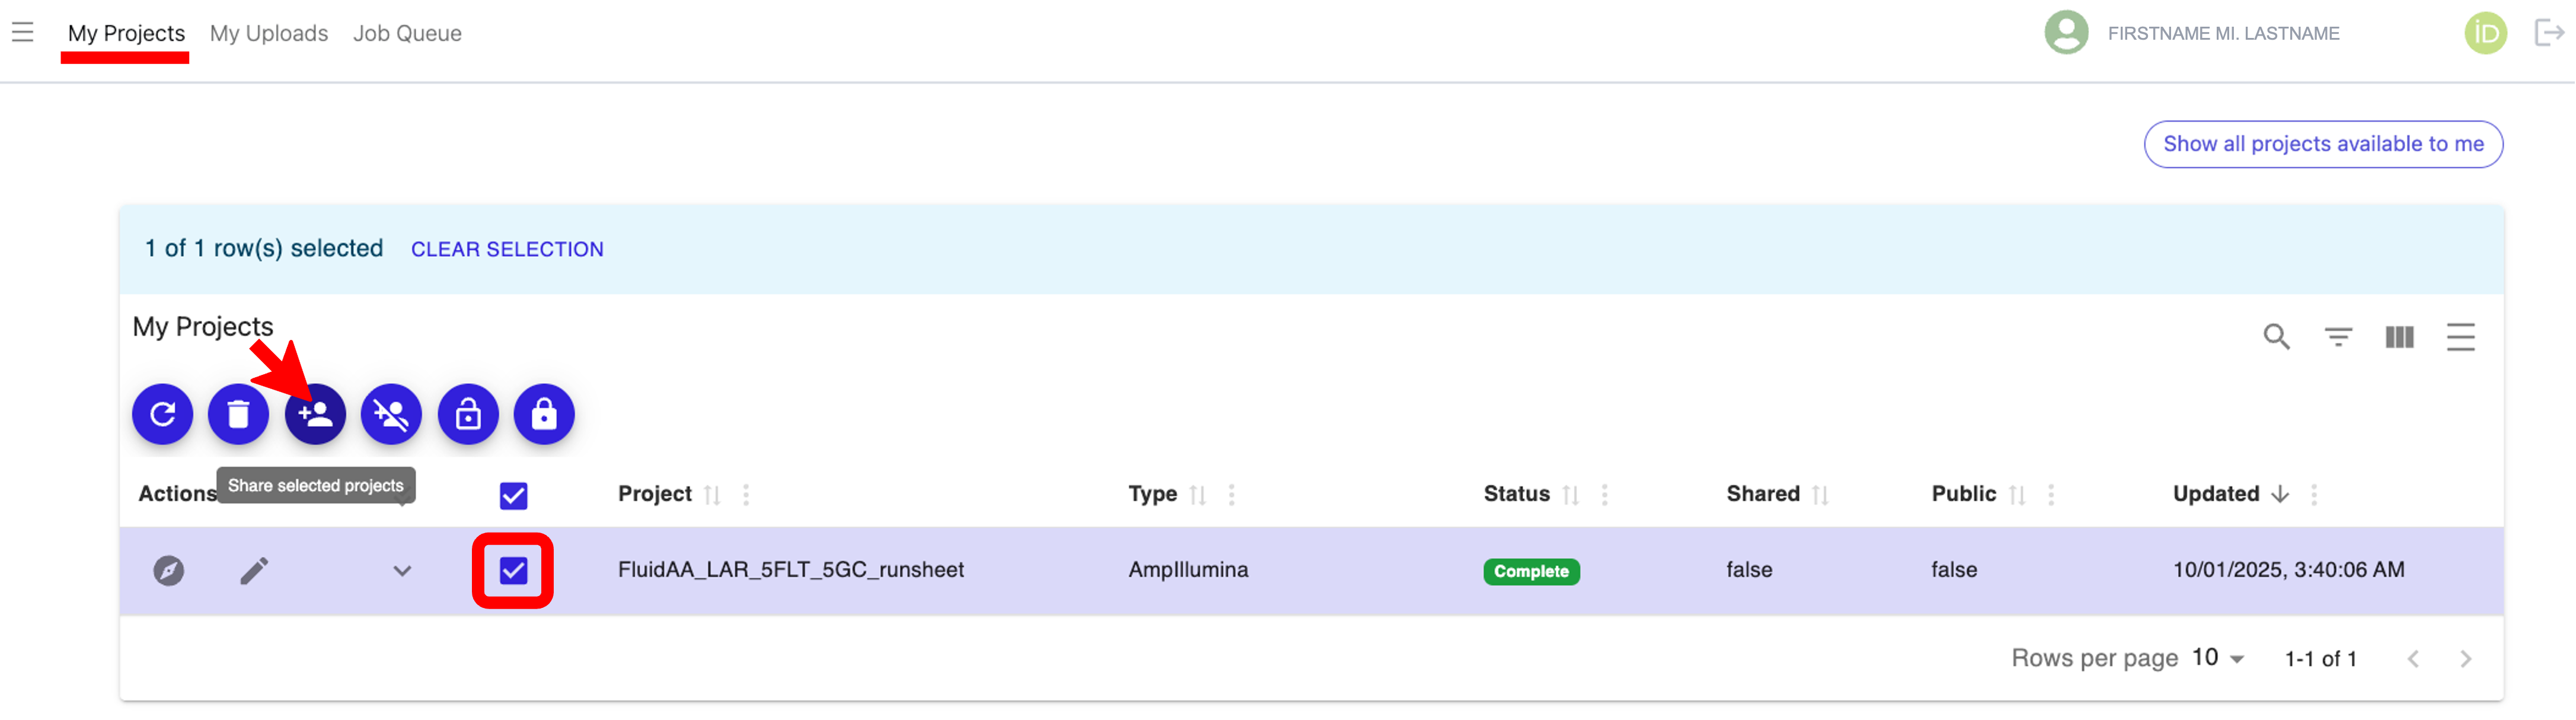
To share jobs, including results files, with other individuals who have NASA EDGE accounts, navigate to the “My Projects” tab at the top of the page, then check the box next to the job you want to share and click the “Share selected projects” icon as shown below:
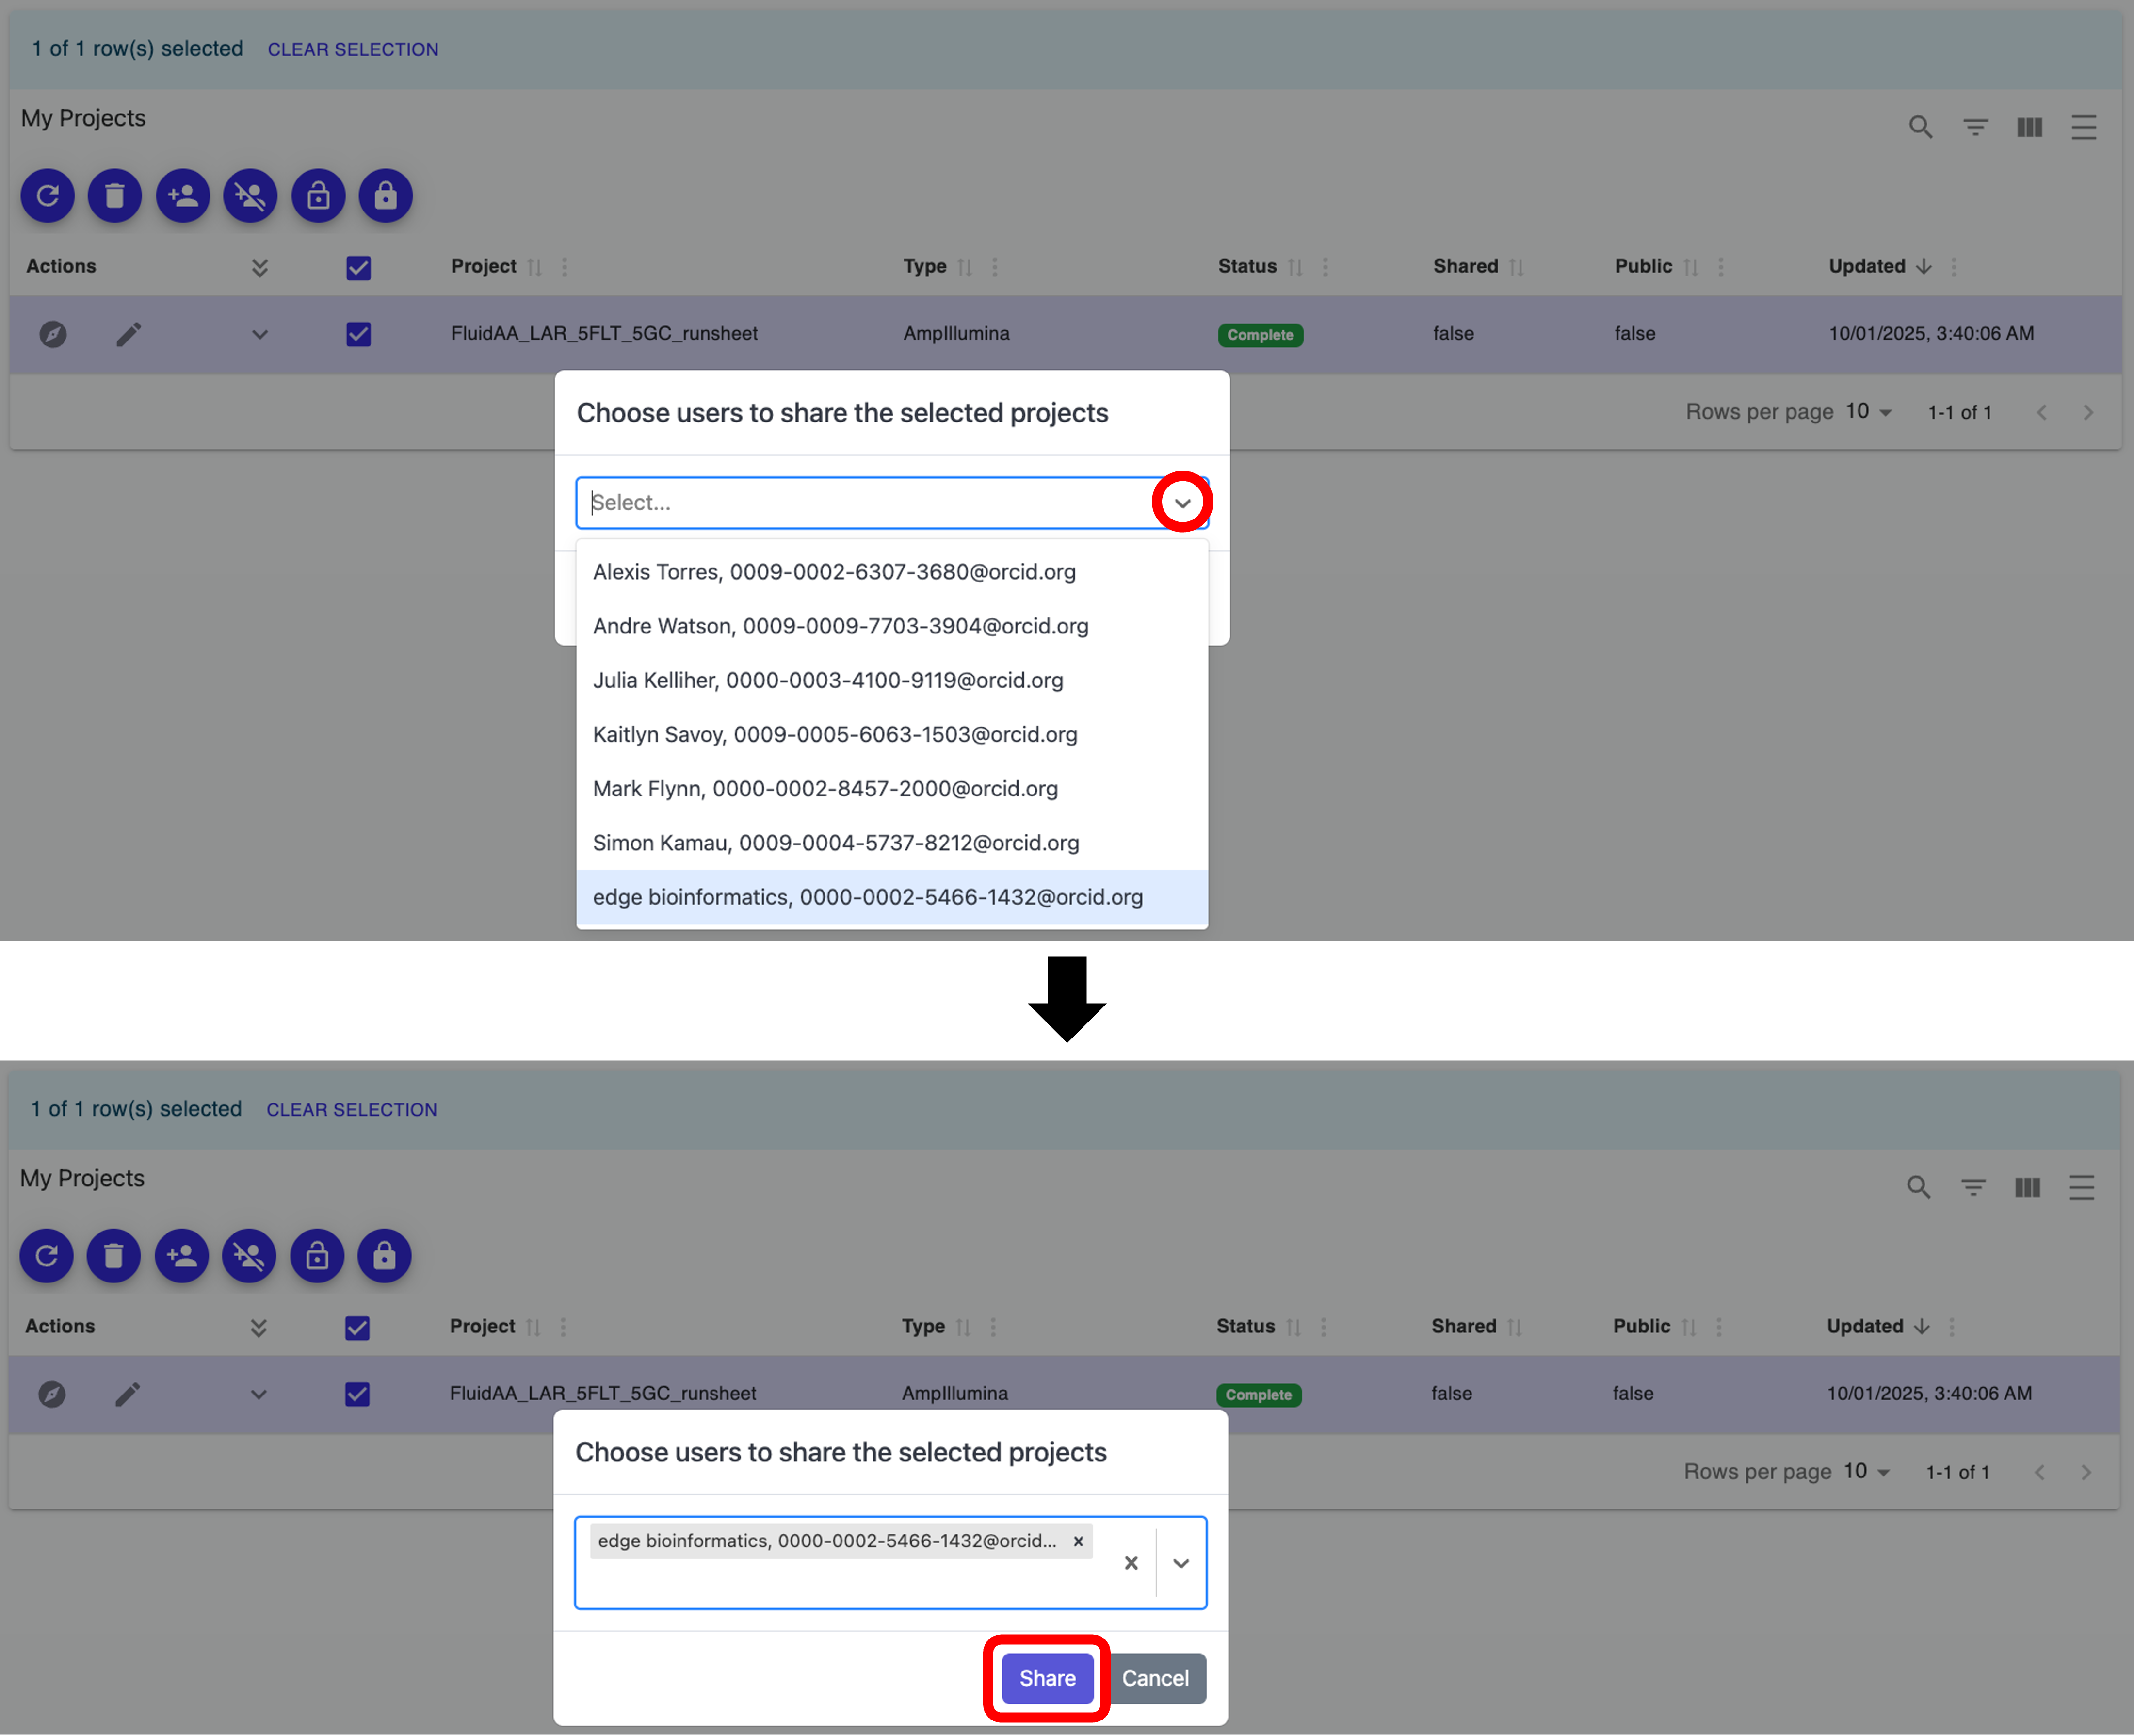
When prompted if you are sure you want to share the selected project(s), click the “Share” button, as shown below:

Click the down arrow to open the dropdown menu containing other NASA EDGE users, and select the user you want to share the job with. Repeat this process to select additional users to share the project with. Once you have selected all users you want to share with, click the “Share” button, as shown below:
Note: You can unselect users by click on the “X” next to their name.
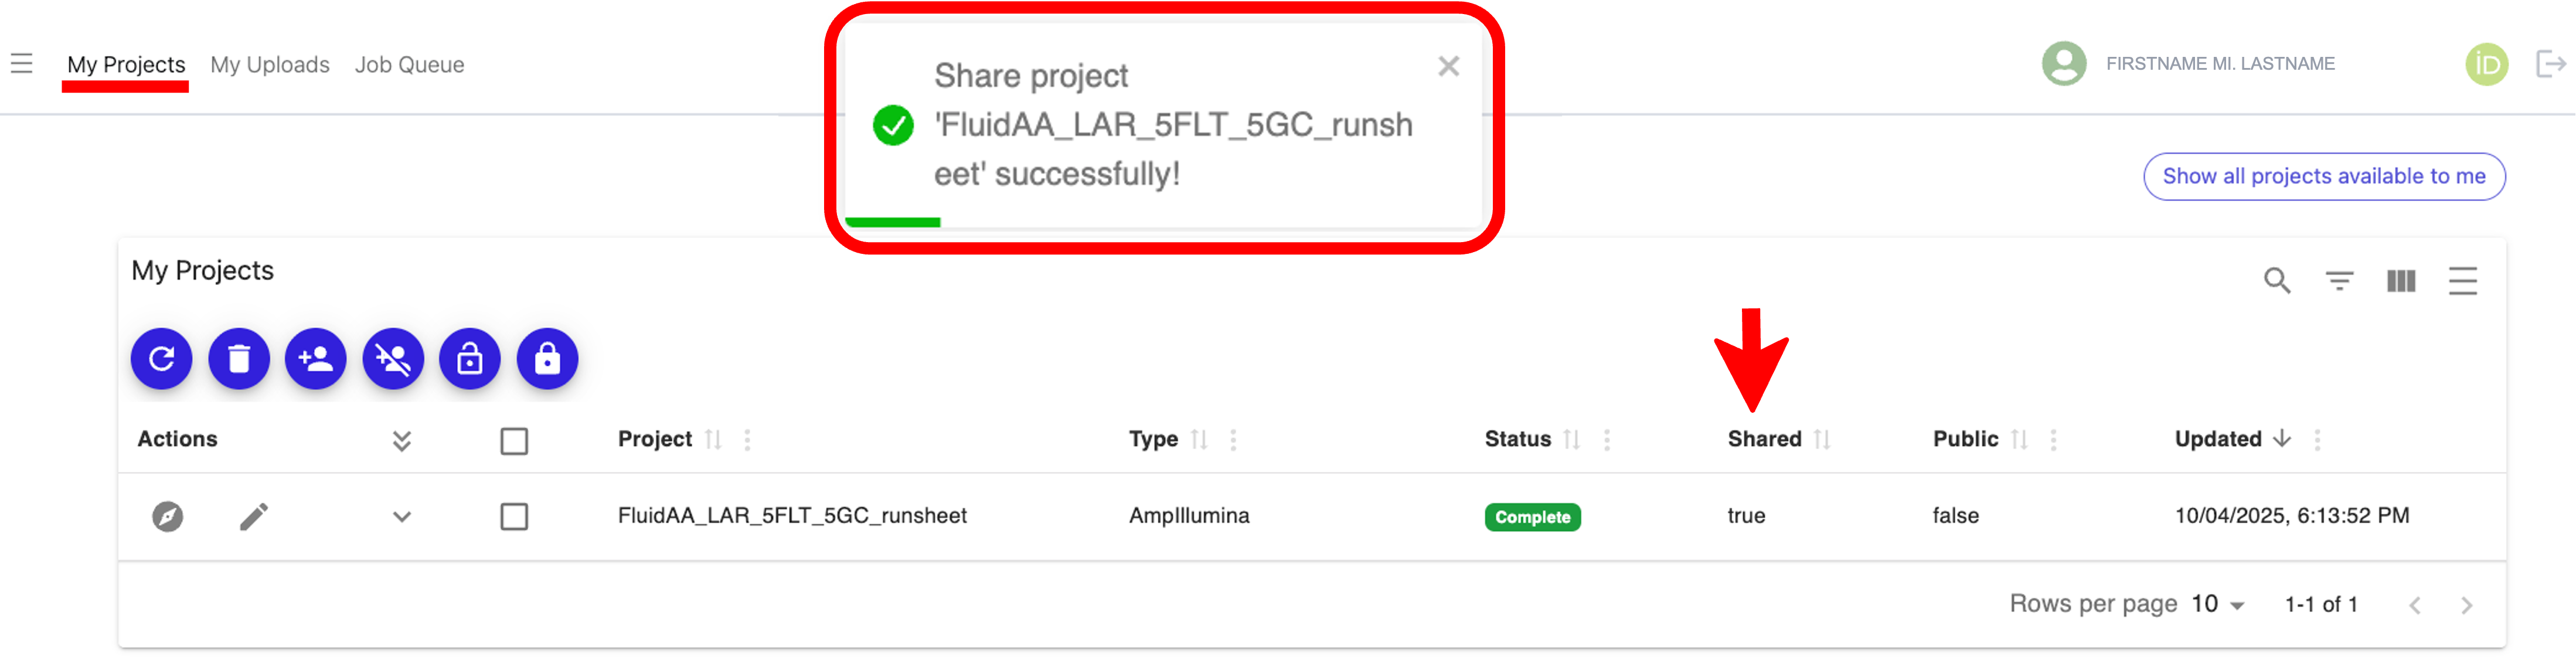
After you click “Share”, a pop-up notification will appear indicating that you successfully shared your job, and you will see “true” under the “Shared” column next to your job, as shown below:
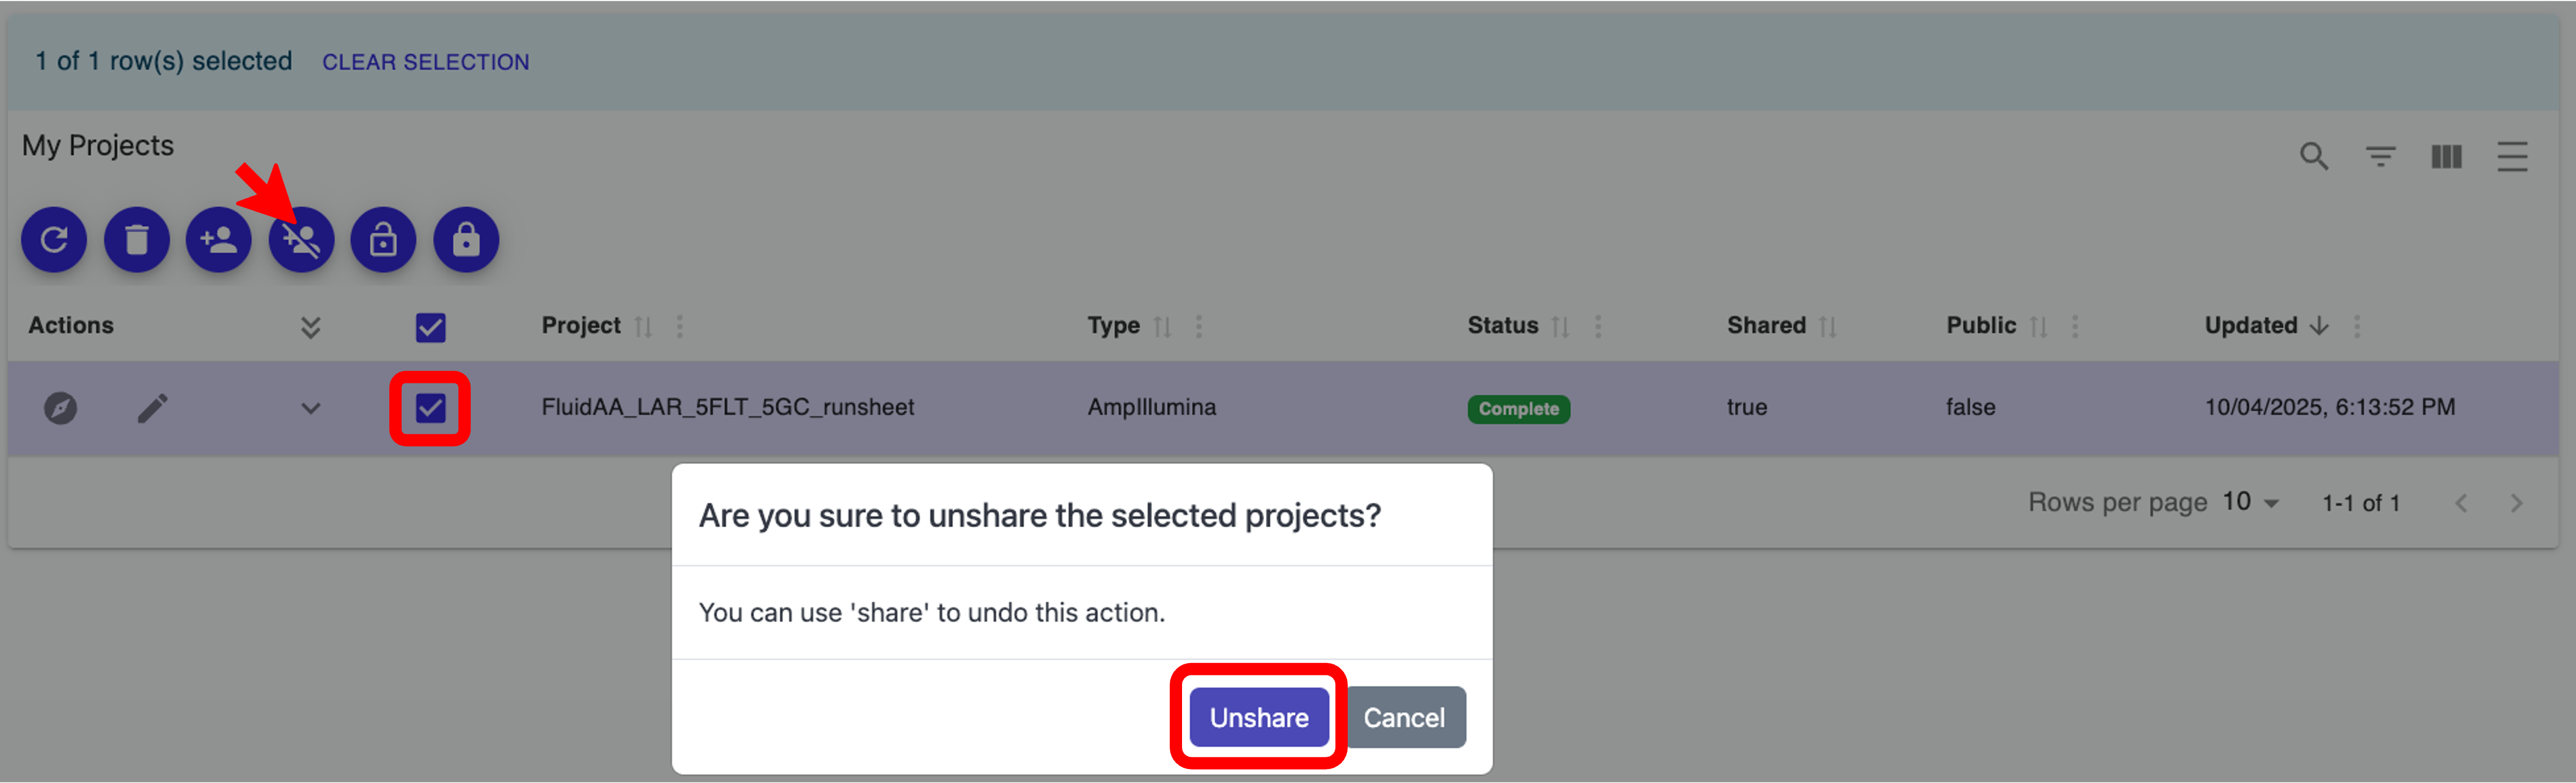
To unshare a job (aka project) with users, check the box next to the project you want to unshare and click the “Unshare selected projects” icon, then click the “Unshare” button in the pop-up window, as shown below:
Click the down arrow to open the dropdown menu containing other NASA EDGE users, and select the user you want to unshare the job with. Repeat this process to select additional users to unshare the project with. Once you have selected all users you want to unshare with, click the “Unshare” button, as shown below:
Note: You can unselect users by click on the “X” next to their name.

After you click “Unshare”, a pop-up notification will appear indicating that you successfully unshared your project, and if you unshared with all users, you will see “false” under the “Shared” column next to your project.
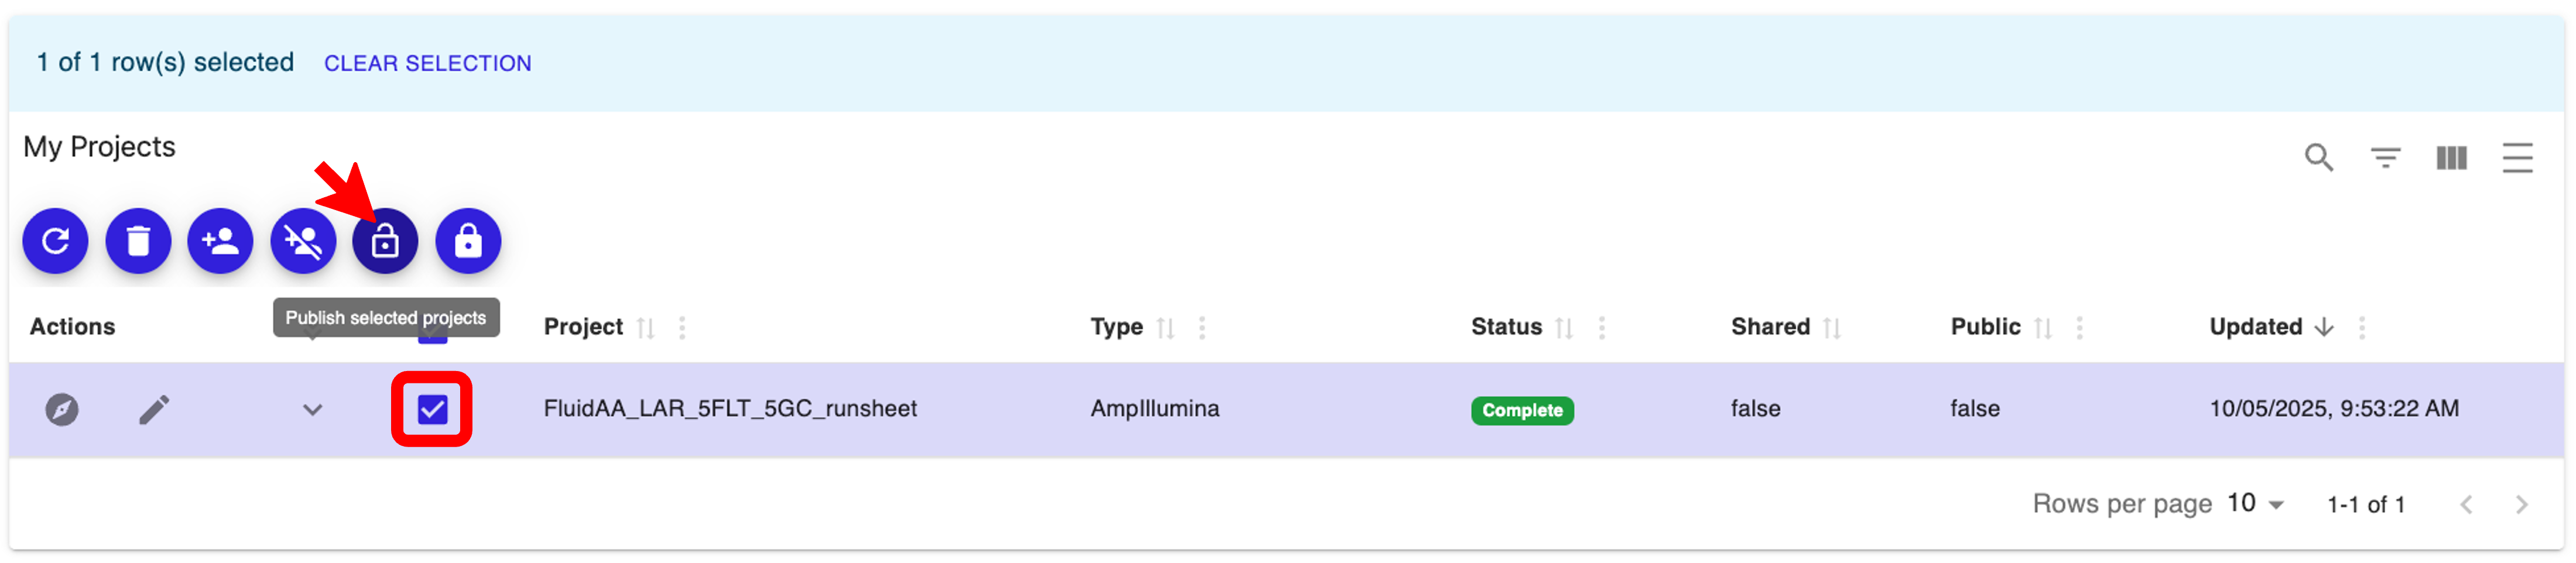
To make a project public so that all NASA EDGE users can view your project, check the box next to the project you want to make public and click the “Publish selected projects” icon, as shown below:
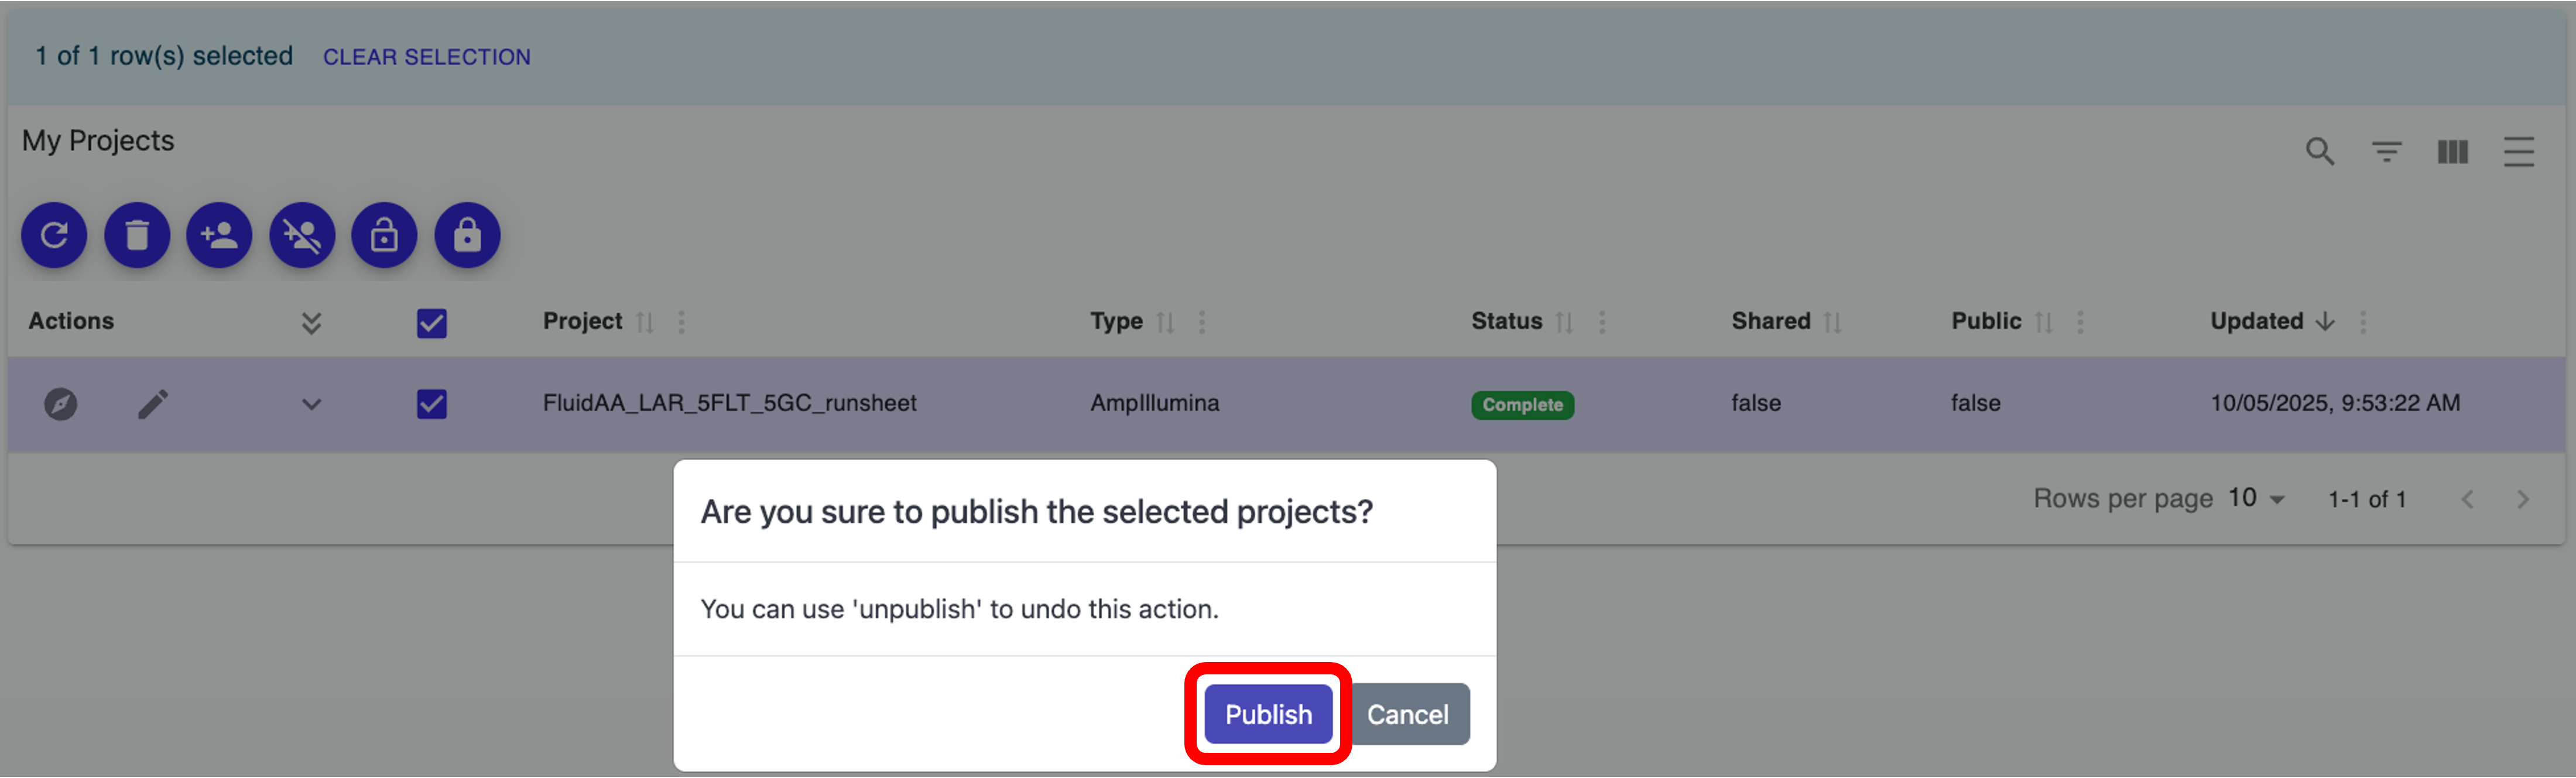
When prompted if you are sure you want to publish the selected project(s), click the “Publish” button, as shown below:
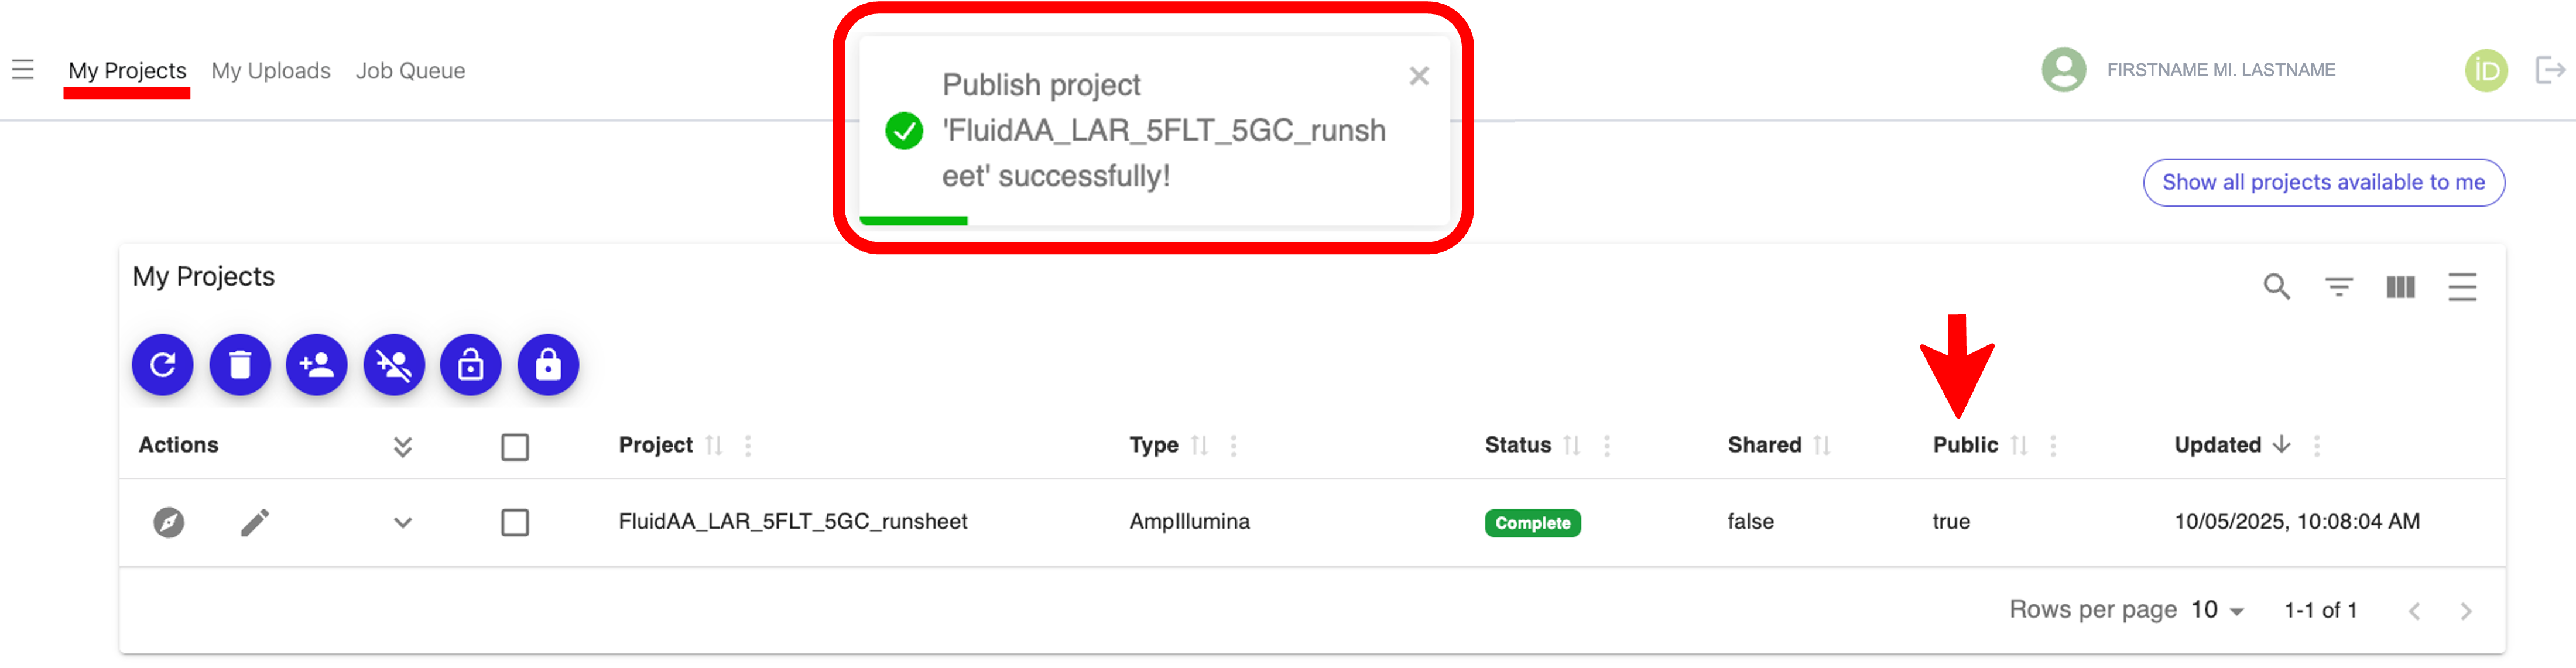
After you click “Publish”, a pop-up notification will appear indicating that you successfully published your project, and you will see “true” under the “Public” column next to your project, as shown below:
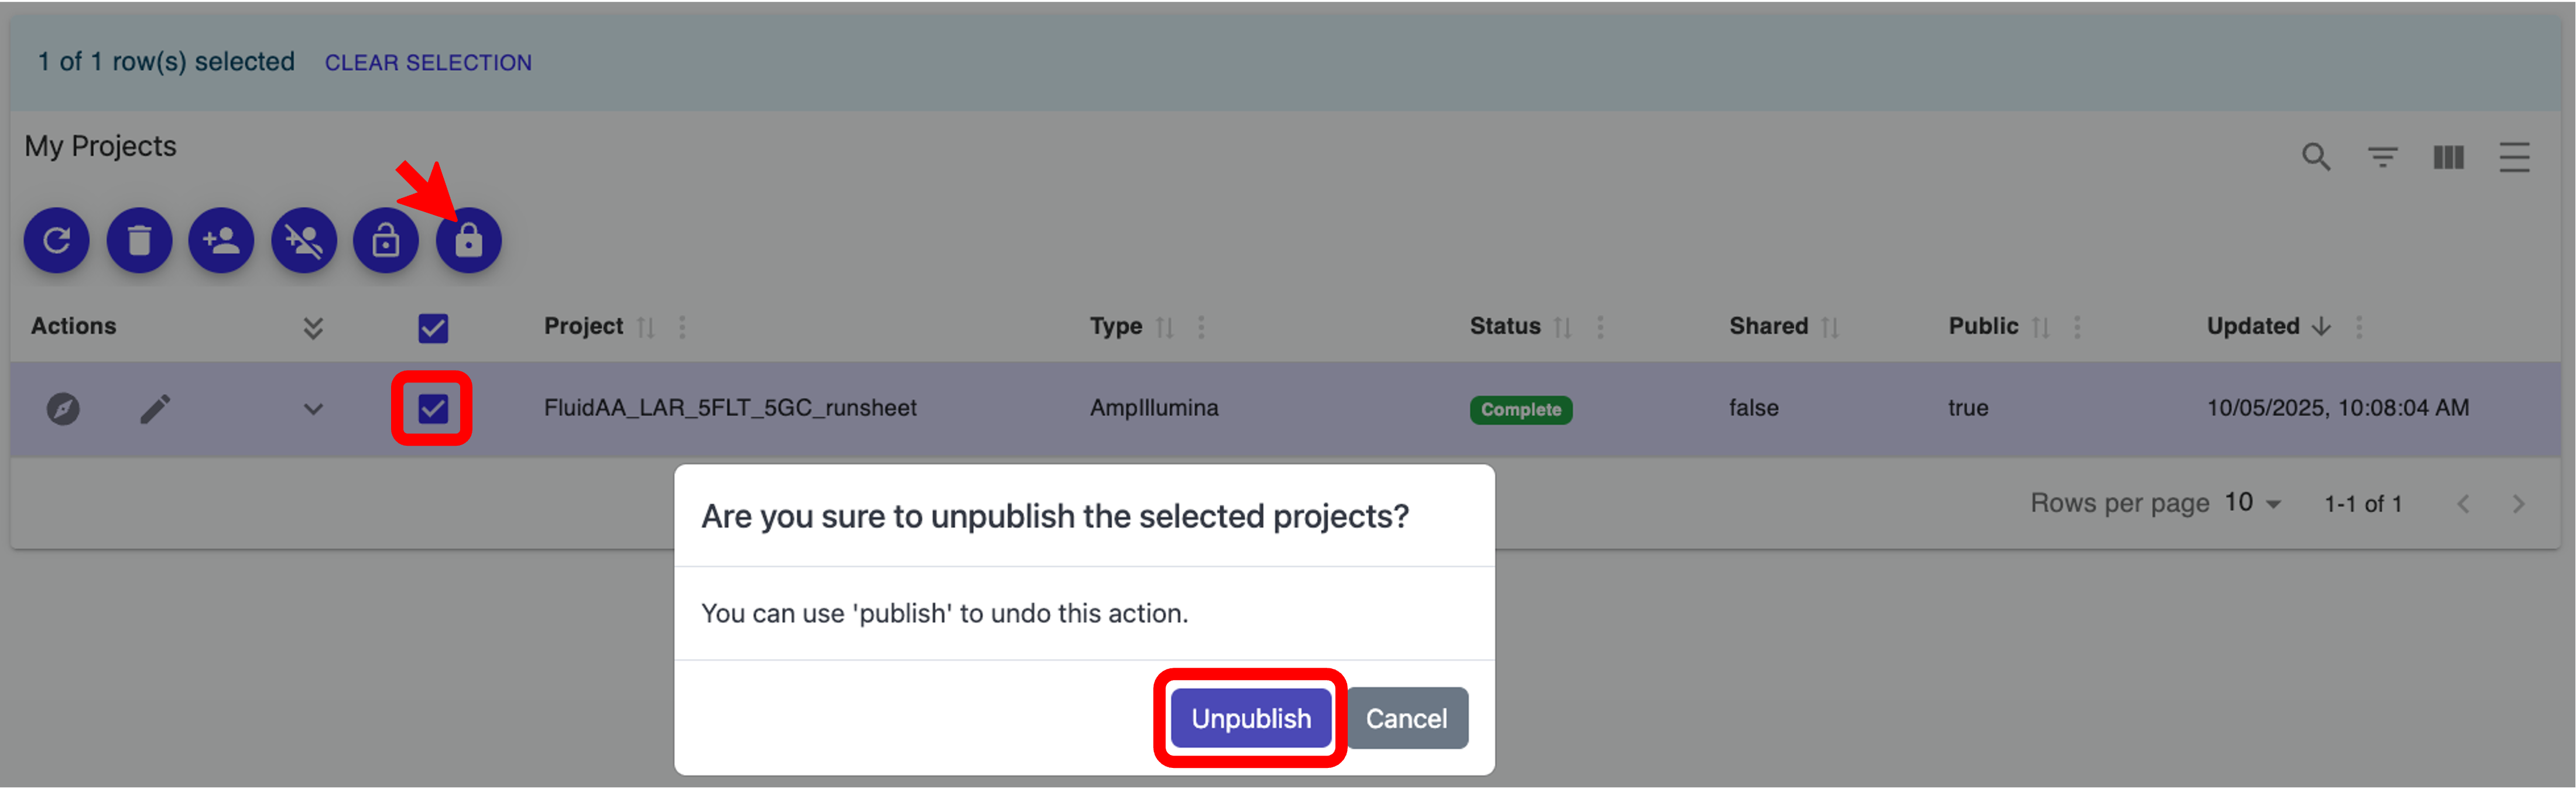
To unpublish a project, check the box next to the project(s) you want to unpublish, then click the “Unpublish selected projects” icon and click the “Unpublish” button when prompted, as shown below:
After you click “Unpublish”, a pop-up notification will appear indicating that you successfully unpublished your project(s), and you will see “false” under the “Public” column next to your project.
Modify projects
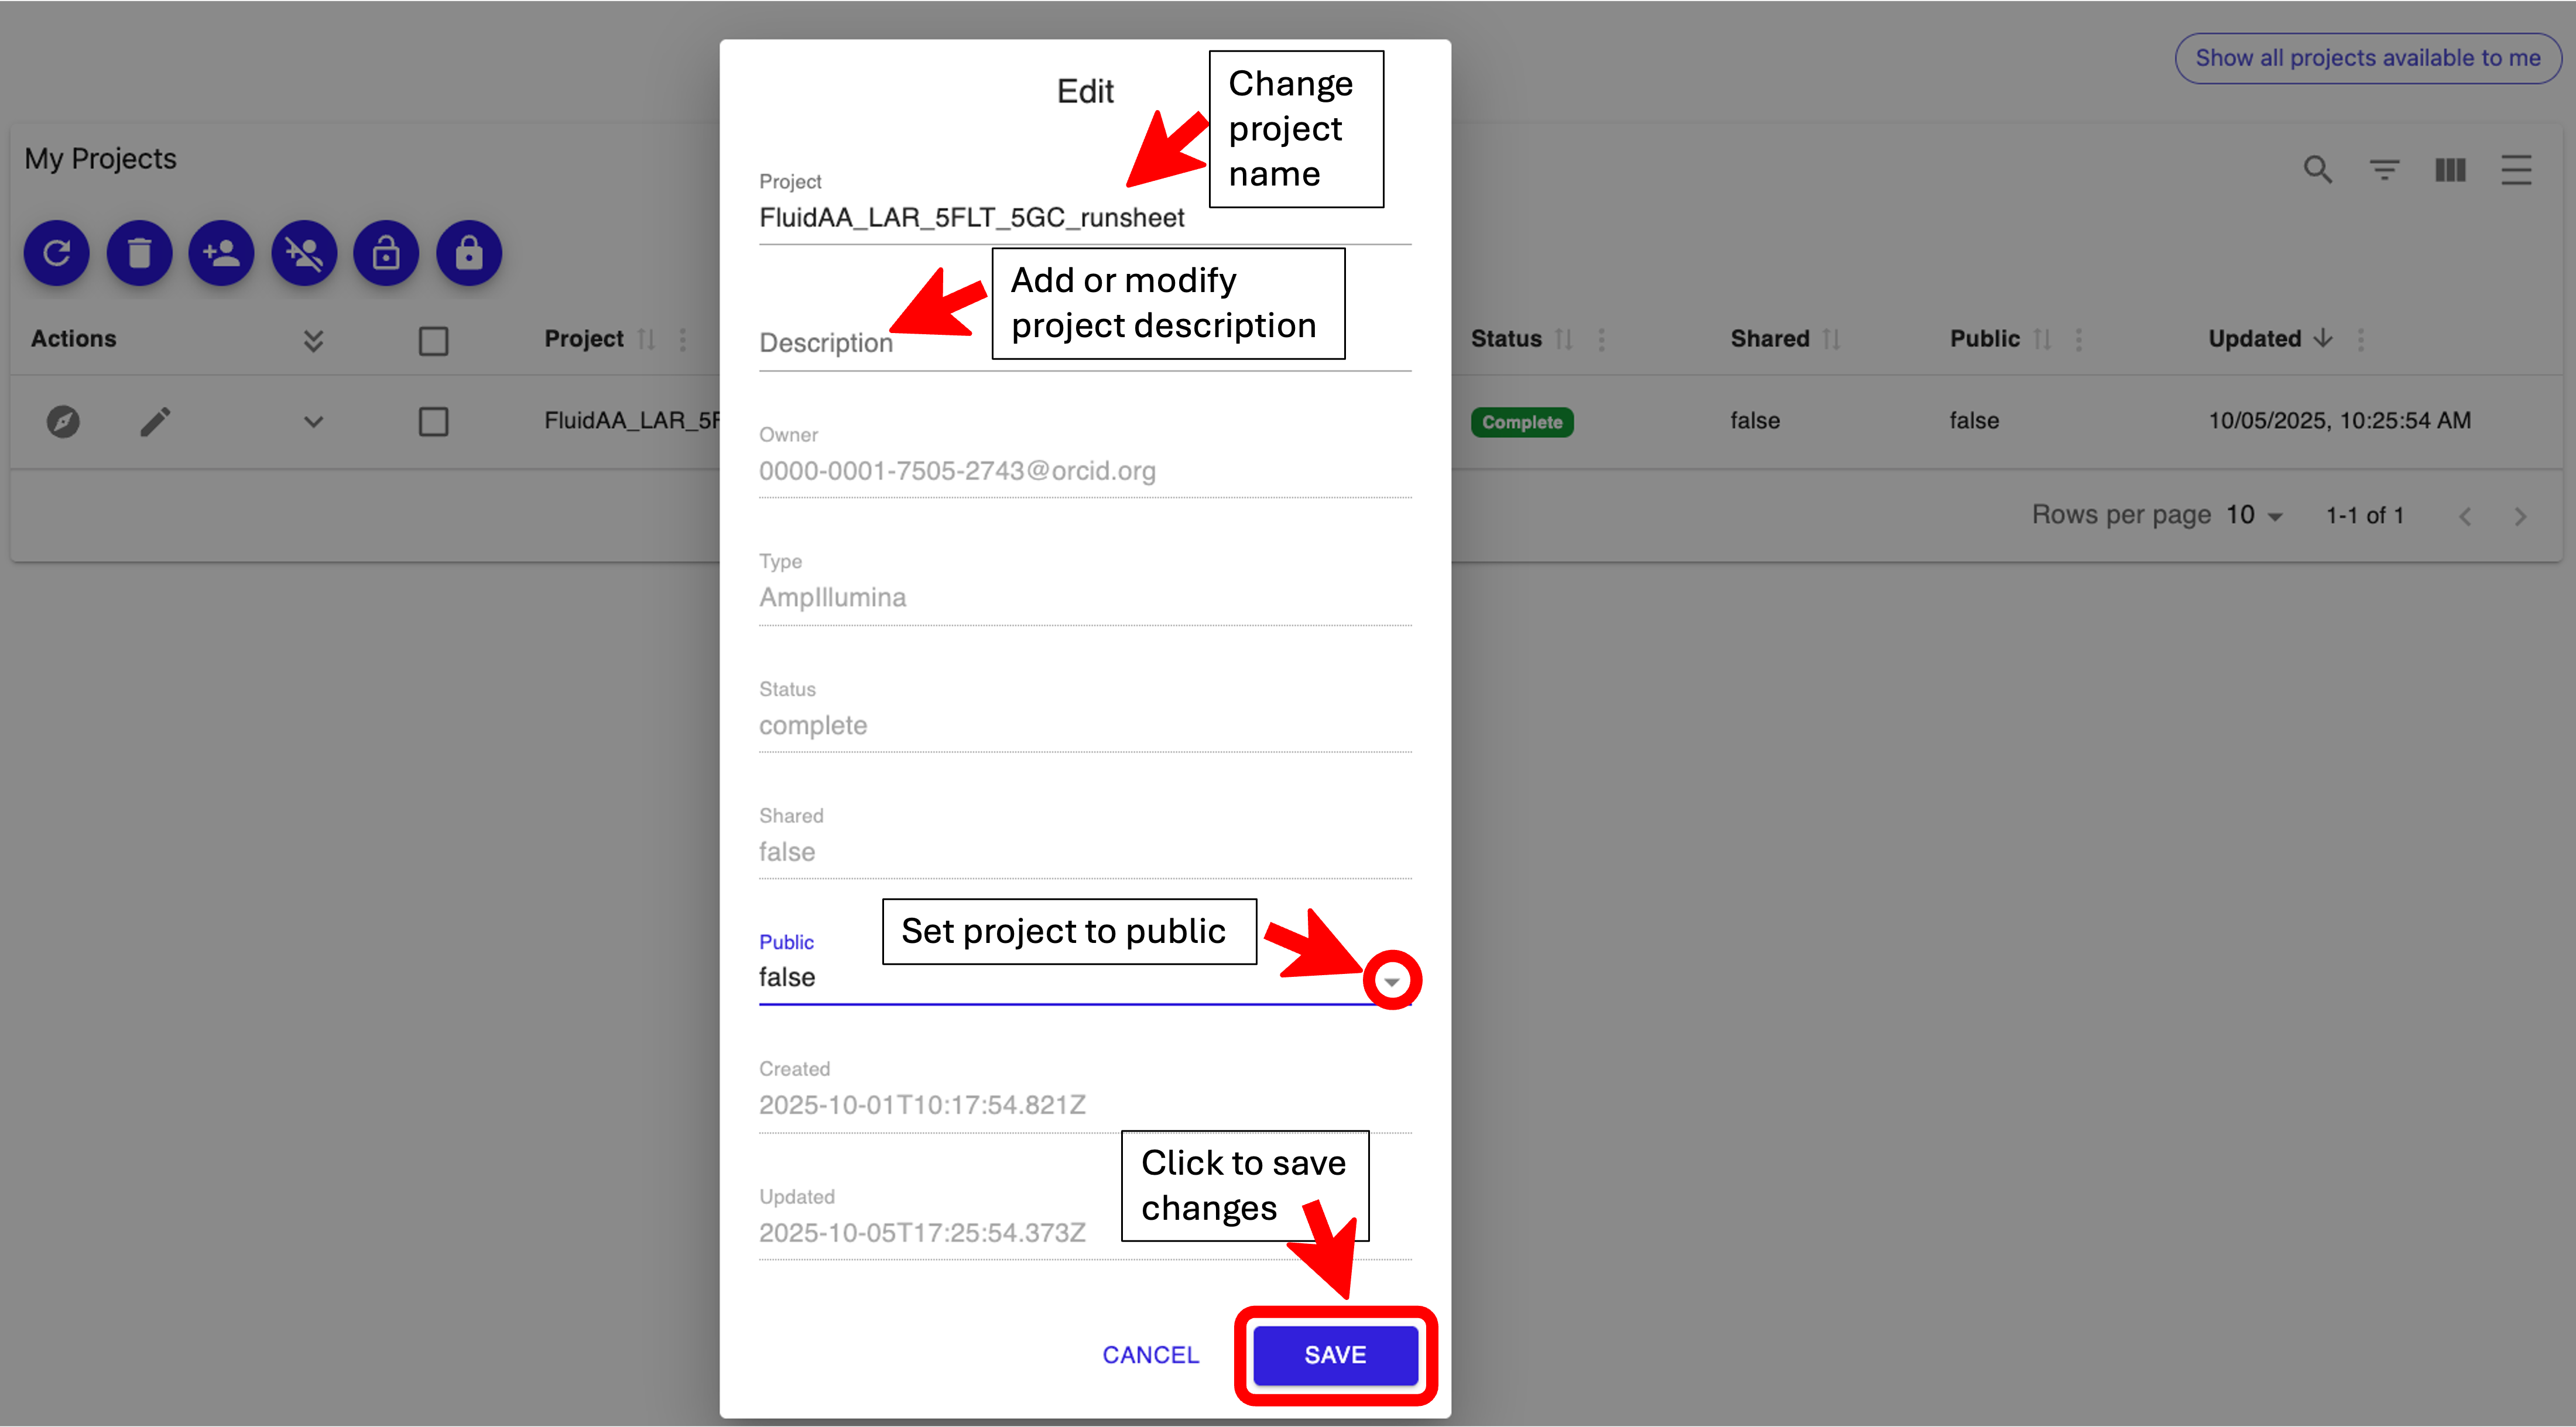
If you want to modify a project, click the “Edit” icon next to the project you want to modify, as shown below:

A pop-up will appear that will allow you to change the project title, add or modify the description, and you can also set your project to public, as shown below. Once you are satisfied with your changes, click the “SAVE” button to implement them.
If you want to delete a project, check the box next to the project(s) you want to delete then click the “Delete selected projects” icon as shown below:

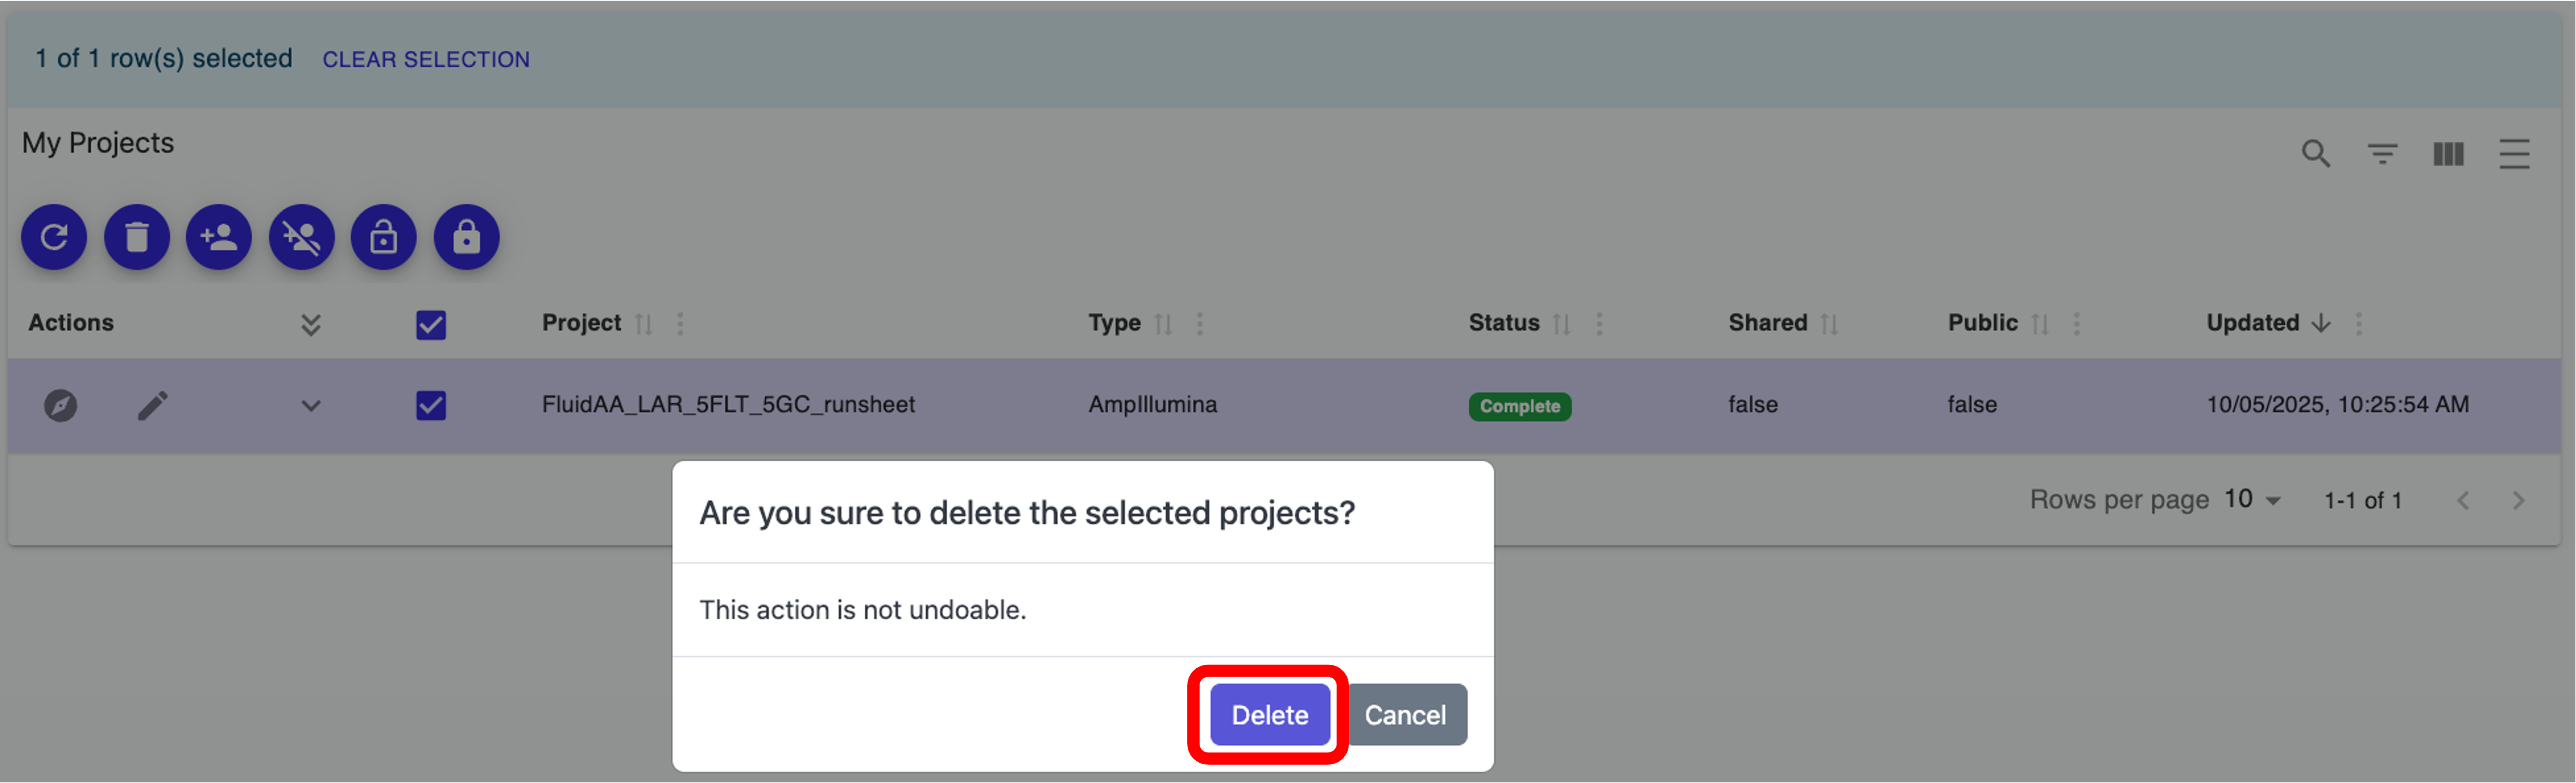
When prompted if you are sure you want to delete the selected project(s), click the “Delete” button, as shown below:
After you click “Delete”, a pop-up notification will appear indicating that you successfully deleted your project, and you will no longer see the deleted project(s) in your “My Projects” table.